PDF reports
PDF documents need the Pro plan. On any other plan the tab opens an upgrade dialog instead, and publishing is refused while either document is switched on.
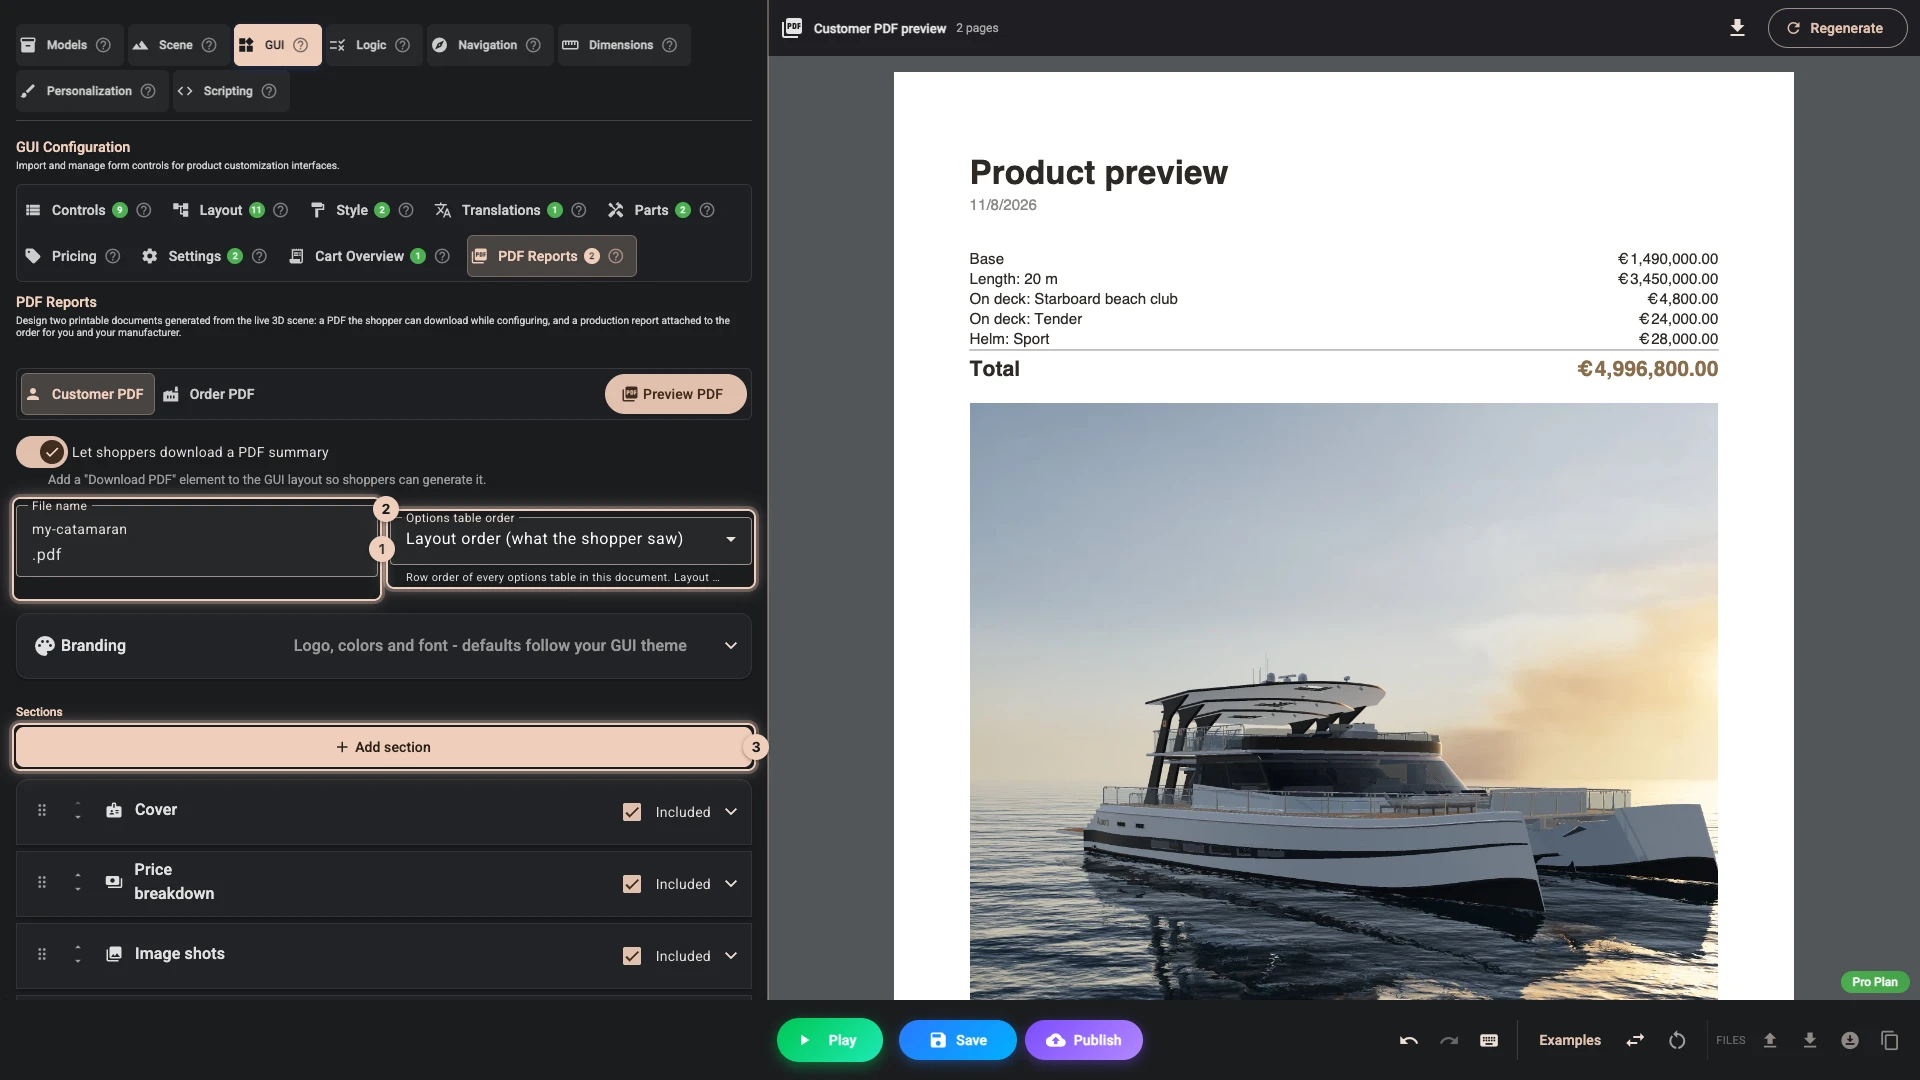
Two documents, generated from what the shopper configured: Customer PDF, which the shopper downloads, and Order PDF, which reaches you with the order. They are designed the same way, but they are for different people and they behave differently. Price it sets up the boat's customer document.
What goes in one
Each document is a list of sections that print in the order you put them in. There are seven kinds:
| Section | What it prints |
|---|---|
| Cover | Your logo, the product title, the date, and optionally the product description. |
| Image shots | Rendered pictures of the configured product, laid out in a grid. |
| Options table | A row per choice the shopper made, in the columns you pick. File uploads, buttons, controls a condition hides, controls left empty and any control with Save the selected value on the order (line item property) unticked are left out. |
| Parts table | A row per part the configuration is made of, with its quantity and unit. |
| Price breakdown | The itemised price lines and the total. |
| Text block | Free text of your own - terms, lead times, care instructions. |
| Configuration link | A link that reopens the shopper's choices in your configurator. |
Add section 3 appends one, the handle on the left reorders them, and the Included checkbox on each header switches a section off without deleting what you configured inside it. Removing a section asks first, because everything inside it goes too.
Switching a document on for the first time seeds it with a sensible starting set - a cover, a price breakdown, two images and an options table - which you are then free to rearrange.
Prices print the way the panel works them out, before any discount, shipping or anything else checkout adds. The total covers the quantity in the panel, with a line showing the multiplier when it is more than one, while the options table's Price column is for one item. The customer document prints in the shopper's currency, at the prices the panel showed them. The order document always prints your shop's currency at your home prices, even when the shopper paid in another currency. What was charged is recorded on the order in Shopify, not on either document.
Both documents also carry a File name 1, which is what the finished PDF is called, and an Options table order 2, which decides the order the rows of every options table print in:
| Order | What it follows |
|---|---|
| Layout order (what the shopper saw) | The order you arranged the panel in the Layout tab - so the document reads in the order your shopper answered. This is the default. |
| Controls tab order | The order the controls are listed in the Controls tab. |
| Alphabetical by option name | Sorted by the control's label. |
A control you have not placed in the layout has no position to follow, so it prints first.
The customer document
Let shoppers download a PDF summary turns on a summary your shopper downloads while they are still on the page, showing what they designed: their choices, rendered pictures of the finished item, and the price the panel showed them, before discounts. It is made in the shopper's browser and saved to their device; you do not receive a copy.
People use it to think it over, to show a partner, or to get a decision from someone else. For a considered purchase that is often what turns a browse into an order.
It needs a way to be triggered. Either add a Download PDF element in the Layout tab, or set a button control's action to Download the customer PDF report in the Controls tab. Without one of those, the document is generated by nothing and no shopper can ever see it - publishing warns you about exactly this.
The wording you type into this document is translatable, so a shopper reading your store in another language gets your section headings, captions, column headers and text blocks in theirs. See Translations.
Manufacturer codes are never printed here. The column is not offered on this document, and it is dropped even if one reaches the generator by another route.
The order document
Generate at add-to-cart and attach to the order turns on the second document, attached to the order. This one is for the people who make the product.
The finished file is attached to the order as a hidden property, so the shopper does not see it in the cart or at checkout. Open it from the order in Shopify admin, or with Order PDF in Order review. The tab still shows an Order property label field, but it no longer changes anything: the attachment's name on the order is fixed.
It contains the same configuration, but it may also print the manufacturer code for each chosen option, which the customer document never shows. That is what makes it useful in a yard: the sheet says "RAL 5004" rather than the Midnight your shopper picked. Those codes are published along with the rest of the configuration, so keep them to references you are happy to make public - see Controls.
It can also carry a link back to the configuration, as a Configuration link section you place like any other. The link is the product page's address at the moment the document is made, so it reopens the shopper's choices only while Remember the configuration in the product-page URL is on in Settings; with it off, the link opens the plain product page. An uploaded image does not travel in it - the reopen link on the order carries that. New order documents start with one at the end; the customer document can have one too, but you add it yourself.
This document is translated only in part. Your own wording on it prints as you wrote it: its section headings, the column headers you renamed, your text blocks, captions and footer. Everything it takes from the panel follows the shopper's language: the option names and choices in the options table, part names, price lines, the built-in labels and the date. An order from a French shopper therefore lists French option names. Manufacturer codes print as you entered them, which makes them the reference your workshop can rely on.
The order document needs 3D Bits pricing: until pricing is enabled the tab will not let you switch it on.
The order document is generated in the shopper's browser when they use the Add to cart element in your option panel. If shoppers buy through the theme's own button, no document is attached - the same as the order snapshot in Settings. On a slow device or connection it is skipped rather than the purchase being held up. An occasional order arriving without its report is expected behaviour, not a fault.
Designing them
Both documents are built from the same seven section types, described here once.
Cover
Tick what you want on it: Logo, Product title, Date and Product description. Heading prints in place of the product title, which Shopify's product supplies otherwise.
Logo width % sets how wide the logo prints, as a percentage of the page. Left empty it is fitted inside its default box - half the page wide at most, and never enlarged beyond the size of the file itself. Setting a value overrides that, including making a small logo bigger than it really is, which prints soft. Generate a preview and look at it.
Image shots
Grid columns sets how many pictures print per row, up to three. Lead with a hero image gives the opening shot a row of its own, which reads better as a lead image, and Hero width % decides how wide it prints - 100 fills the page, anything less is centred.
Capture width is a different thing, and the two are easy to confuse: it is the pixel width each picture is rendered at, so it controls sharpness rather than printed size, and it is capped so that a large number cannot make generation crawl on a phone.
Then add the shots themselves. Each one has a Source, and this is the field worth understanding:
| Source | Where the camera is |
|---|---|
| Start camera view | The view the configurator opens on - the camera position and target you set in the Scene section. |
| Focal camera view | One of the focals you defined in the Navigation section. You pick which one. |
| Standard view | A technical view rendered without perspective: Isometric, Front, Back, Left, Right, Top or Bottom. |
Left and Right are named as seen in the Front view: Right shows the side on the right of the Front picture, whichever way the scene is set up. Earlier releases named them the other way round in a left-handed scene, and showed the back as Front in a right-handed one, so a shot saved before this correction may now come from the other side: Right, Left and Isometric in a left-handed scene, Front and Back in a right-handed one. Top and Bottom are unchanged. Generate a preview and check those shots.
Only focals can drive a shot. Points of interest are markers on the model and cannot be used as a camera source here - if the Focal dropdown is empty, you have points of interest but no focals. Go to Navigation and add one.
If you later delete a focal a shot points at, that shot is silently skipped when the document generates. Publishing warns you when it finds one.
For an order document, standard views are far more useful than an attractive three-quarter angle, because someone has to build the thing. They are drawn without perspective, so what is measured on the page is proportional to the real product.
Each shot can also carry a Caption, and can be restricted to particular Models and Parts - individual glTF nodes, nothing to do with the Parts tab - so a detail drawing of the helm shows the helm rather than the whole boat. A standard view frames only what you selected; leaving both empty frames the whole scene.
Two checkboxes fine-tune that:
- Fit to models keeps the view's direction but moves the camera to frame the selection precisely. Use it when the product grows or shrinks past the view you authored. It is offered on Start camera and Focal shots, because a standard view already fits.
- Hide other models hides everything outside your selection while the picture is taken, which is how you keep a ground plane or a room out of a detail shot. It appears once you have selected something.
Keep the total modest. More than half a dozen pictures in one document noticeably slows generation on a phone, and publishing says so.
Options table
Heading titles the table, and Columns decides what it contains. Eight are available:
| Column | Notes |
|---|---|
| Row number | The row's position in the printed order, counting from 1. |
| Option | The control's label. |
| Image | The option's picture, if it has one. |
| Selection | What the shopper chose. |
| Color swatch | A printed swatch of the chosen colour. |
| Price | What that choice added to one item. |
| Description | The option's description text. |
| Manufacturer code | Order document only. It is not offered on the customer document, and never printed there. |
An image, price, description or manufacturer-code column with no data anywhere in a particular configuration is left out of that document rather than printed empty, so an options table does not go ragged on a simple order.
Every selected column except the swatch can be renamed in its Header box, so "Option" can become "Component" and "Selection" can become "Specified". A name you type for a column you later switch off is kept, so switching it back on restores your wording.
Beside it, Width % sets how wide each column prints, as a percentage of the page. Leave one empty and it shares whatever the others leave over, so setting a single width is usually enough. If the widths you set would leave the remaining columns nothing, they are scaled back rather than squeezing a column to nothing. If you set a width on every column they are treated as proportions and stretched to fill the page, so 30/30 and 50/50 print identically. Widening the Image column also enlarges the pictures in it.
Description lines prints small text under each row, across the whole table. There are two sources and you can switch on either or both: Control description prints the description you gave the control in the Controls tab, and Selected option description prints the description of the option the shopper actually chose. Both are off unless you pick them.
Header background, Header text and Column stripe style it. The header defaults to your accent colour, and every second column is shaded with the stripe colour.
Parts table
A row per part from the Parts tab, showing its label, the quantity the configuration worked out, and its unit. Parts inside an assembly are indented under it, so the table reads like a build sheet.
Heading titles it, and Number the rows prefixes each part with its position. Otherwise there is nothing to set - the content comes from the Parts tab.
Both documents print the same parts table, and neither carries your internal part numbers. The PDF is generated in the shopper's browser, and part numbers never reach it. The parts export in Order review is the artifact that carries them.
Price breakdown
Heading titles it, and List the per-part breakdown above the total prints every price line - the base price, each priced choice, each formula - above the total rather than the total alone. Those are price lines; this checkbox has nothing to do with the Parts tab.
The section is skipped automatically when 3D Bits pricing is not enabled, and publishing tells you if you have left one switched on in a configurator that does not price.
Text block
A heading and a body. This is where terms, lead times, care instructions or a production note go.
Configuration link
Prints a link that reopens the configuration in your configurator, with an optional heading of your own. It goes wherever you drag it, though near the end usually reads better than the cover: a real configuration URL is long, and at the top it pushes your first image onto page two.
Branding
Under Branding you set a Logo URL, an Accent color, a Text color, a Font and a Footer text that prints on every page.
Colors from GUI theme picks one of the theme variants from the Style tab, and that variant's colours become the document's defaults. Leave the accent and text fields empty and the document simply matches your configurator without separate work.
Fonts, and the language trap
The Font dropdown offers two kinds of entry: fonts you registered in the Style tab, which get embedded into the PDF, and the three built-in PDF fonts, which are Helvetica, Times Roman and Courier.
Only .ttf, .otf and .woff files can be embedded into a PDF. A registered font whose file is a .woff2 - the usual format for a web font - cannot be, so the document silently falls back to a built-in font.
That matters beyond looks. A built-in font can only print the Western European character set. Anything outside it - Greek, Cyrillic, Polish ł, Turkish ş, Chinese, Japanese, an emoji in a shopper's engraving text - prints as ?.
If you sell in a language that needs those characters, register a .ttf or .otf version of your font in the Style tab and select it here. Then generate a preview with real text in that language and read it before you publish.
Previewing
The first time you open the tab, Composer generates a preview by itself. After that, Preview PDF 1 generates the real document with real content and shows it where the 3D view was, so you can check a long product name does not overflow and the pictures frame properly. The pictures show what a shopper's would, with none of Composer's handles in them. It needs a scene loaded in the 3D preview first, since the pictures are rendered from it.
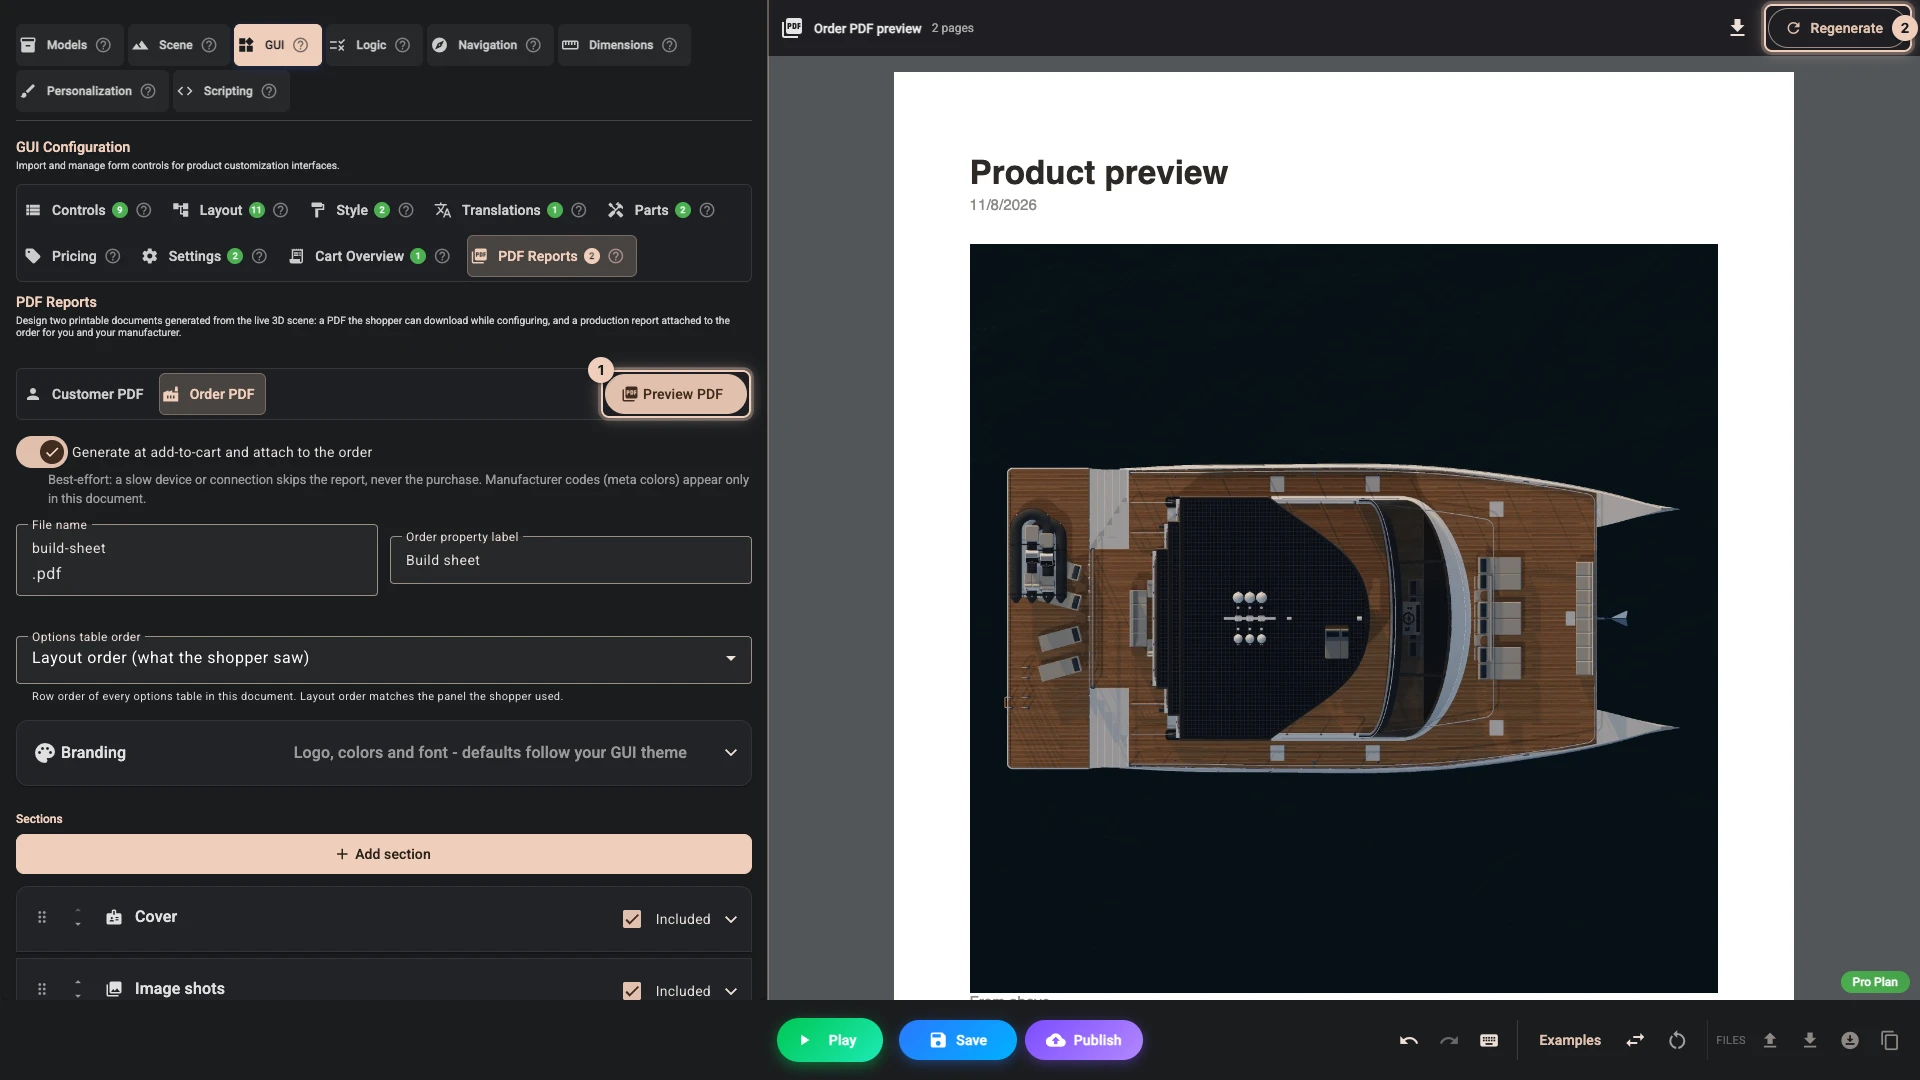
The preview shows the page count, has a Regenerate 2 button for after you change something, and lets you download the preview itself so you can look at it in a real PDF reader.
Do check it with your longest option names and your most complicated configuration rather than the default one, since that is where layouts break.
Before you publish
Publishing does not silently let a broken document through. It refuses outright if either document is switched on without the Pro plan, and it raises a warning - which you should read rather than dismiss - for each of these:
- the customer document is on, but nothing in your layout can trigger it;
- the order document is on, but 3D Bits pricing is not;
- a document has a price breakdown but the configurator does not price, so that section will be skipped;
- a shot points at a focal that no longer exists, so that picture will be skipped;
- a document captures more than six pictures, which is slow on a phone.
Where to go next
- Layout - the Download PDF element that triggers the customer document.
- Navigation - focals, which are what a Focal camera view shot points at.
- Style - the font registry these documents draw on.
- Translations - offering the customer document in the languages you sell in.
- Settings - the order snapshot, a lighter-weight record of the same configuration.
- Order review - where the generated order document turns up.
Verified against the product in November 2026