Variants
A variant is a rule saying "when the shopper picks this, the scene does that". Everything that makes a configurator a configurator rather than a 3D photograph comes down to these.
There are eight kinds, and they solve different problems. Most configurators use two or three. The catamaran tutorial uses most of them.
This page is the map. It explains what each kind is for and what it can and cannot do, then sends you to the panel where you actually set it up, because that is where the field-by-field detail lives.
| Kind | Where you set it up |
|---|---|
| Showing and hiding models and parts | Model Properties |
| Material variants baked into the file | Model Properties |
| Colours and textures defined here | Model Properties |
| Moving, rotating and scaling | On the element itself - a model, a part, a light, a marker, a dimension or a decal |
| Animations baked into the file | Model Properties |
| Lights coming on and going off | Scene |
| Markers, dimensions and decals appearing | Navigation, Dimensions, Personalisation |
| The look of the surroundings: sky, ground, background | Environment |
Markers and dimensions draw in Play and on the product page on Standard and Pro, and decals on Pro only. Every other kind in this table works on every plan, Base included.
Showing and hiding parts
The workhorse. A part of your model is visible only when a particular option is chosen.
The boat's file holds three helms, all in the same place. The classic one appears when Helm is Classic and the sport one when it is Sport. The shopper sees one boat that changes helm, when really it is three helms taking turns.
This is how most configurators are built, and it works because it is honest about what it does: you prepared each one, so each one looks exactly right.
You set these conditions on models, and on individual parts inside a glTF or GLB file with the tune button at the end of a row in Nodes.
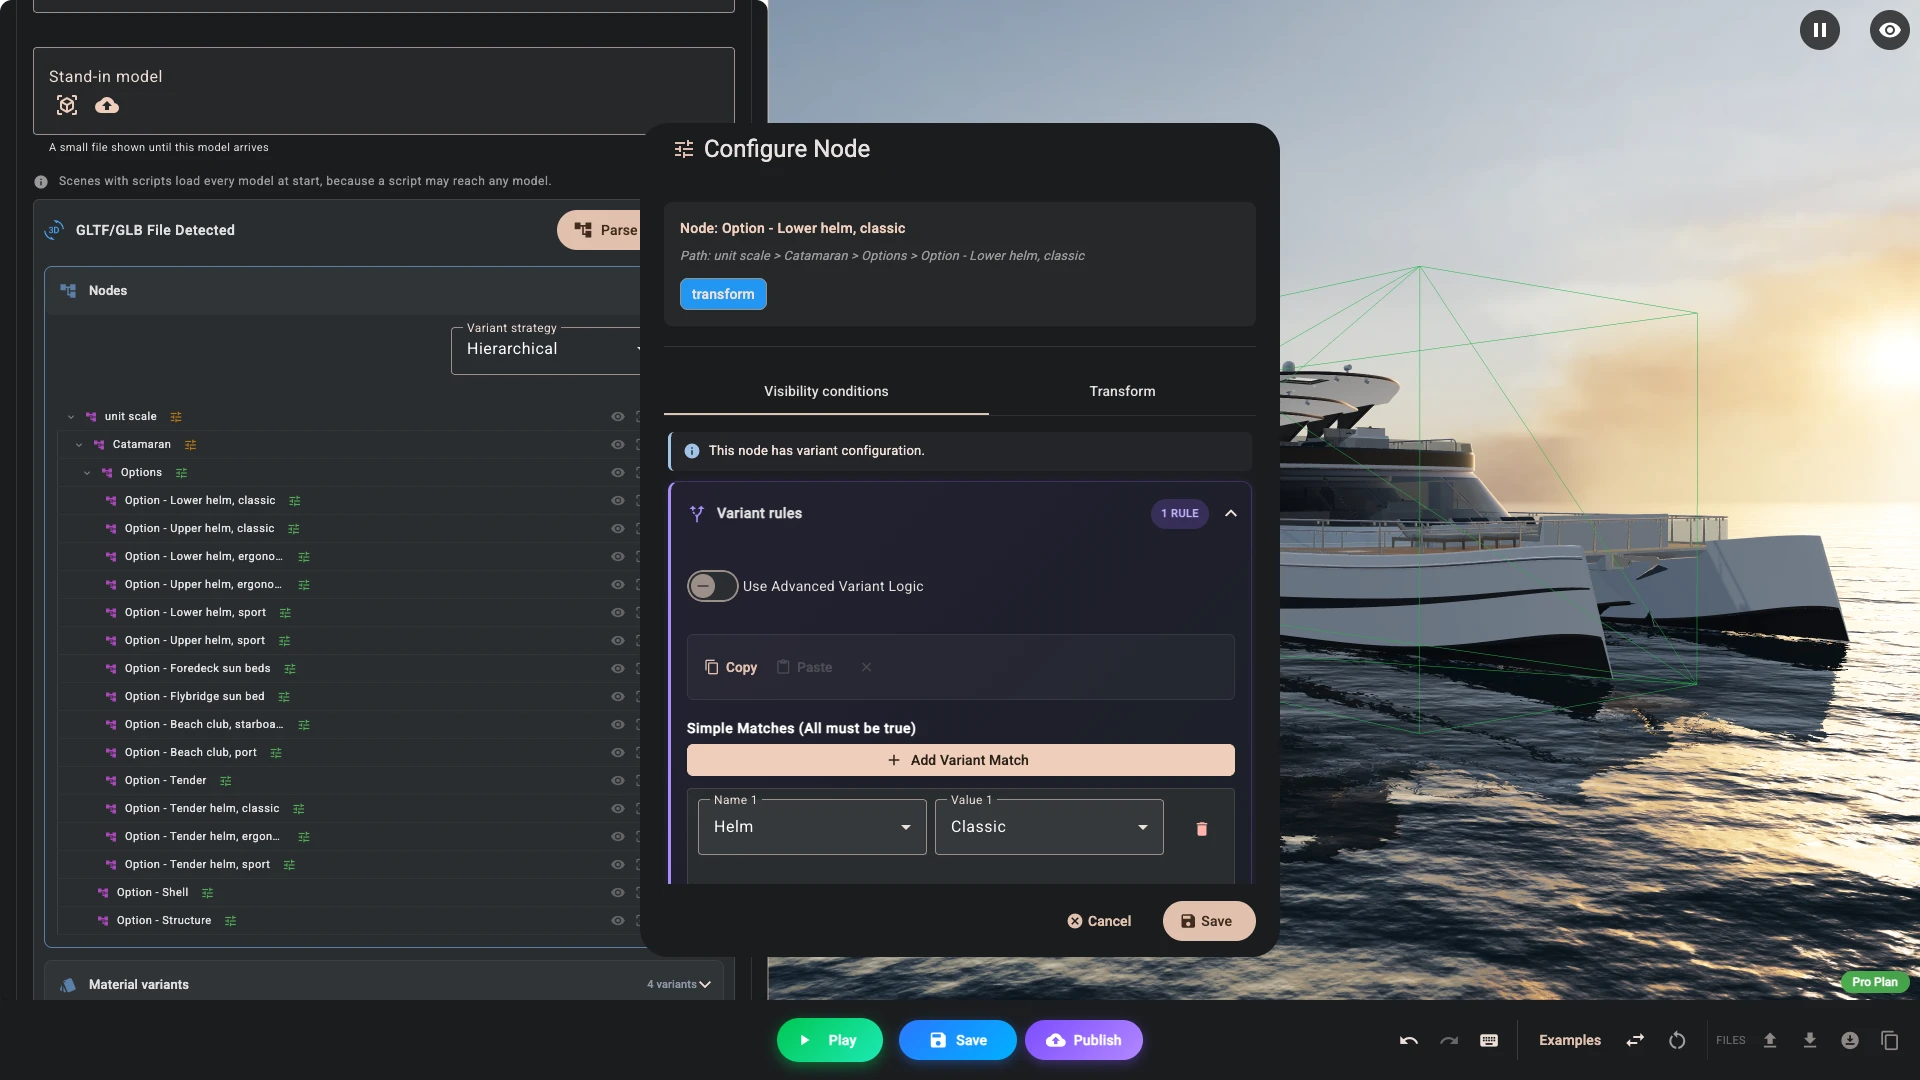
If a model's rule asks for one value of a control and any single part inside it asks for a different value of the same control, that part could never appear, so the model's rule is ignored for every selection: the whole model stays, parts with no rule always show, and the part rules alone decide. Composer warns on the model and offers Remove the model rule. Rules that do not clash both apply: a part shows only while the model's rule and its own are both true.
The safe habit is to gate the whole model, or gate the parts, but not both.
If you want an option value that hides things rather than showing something, a "None" choice, add it to the control and write no rule that matches it. The Void entity panel at the bottom of the Models section is for older projects with no controls, where it puts such a value in the editor's own list. It does nothing on the product page.
Material variants from your 3D file
If your glTF file carries the KHR_materials_variants extension, which Blender can export, its variants come across when the file is parsed, and you connect each one to an option.
This is the neatest route for colour and finish changes, because the alternatives are already defined in the file by whoever made it. One boat, four decks, no duplicated geometry: Finishes connects them to the Planks control.
Each variant in the list has a play button that puts that material on the model right there in the editor, so you can see what you are connecting before you write the condition.
These do not work like colours and transform variants, where the first match wins. If two of them match at once, both are applied in list order, so where they paint the same parts the lower one wins: give them conditions that cannot both hold. When none match, the model shows the file's own materials. An instanced copy of the same file follows the rules on the first copy; turn off Share geometry with identical models (instancing) to give it rules of its own (see Sharing geometry between copies).
Colours and textures set here instead
When the file does not carry material variants, you can define the alternatives in Composer directly.
Two things to be clear about, because this is where the most time gets lost. You do not point at a part. You point at a material and give it a different base colour, or at a texture and give it a different image. A material is shared by every mesh that was painted with it, and copies of the same model file share their materials and textures too, so a swap lands on all of them together. The Materials and Textures lists show you which meshes use each entry, which is the fastest way to find out how far a change will reach before you commit.
If your file paints the hull and the deck rail with one material and you only want the hull to change, no colour rule can separate them. That is a job for the software that made the model.
Entries are checked in order and the first one whose condition matches wins. When none match, the material or texture goes back to what the file shipped with, so you do not need a rule for the default.
Colours are ideal for products that come in many shades, since defining twenty colours here is far lighter than shipping twenty copies of the model. The boat's Collection control works this way, on its Hull paint and Hull stripe materials. Texture swaps suit patterned finishes where you have the images, and the replacement should match the original's UV layout or it will land in the wrong place.
Moving, rotating and scaling
A transform variant changes where an element sits, how it is turned, or how big it is, when a condition matches.
This is what you use for a gangway that slides out, a hatch that opens, or a fitting that shifts on a longer hull. If several rules could apply at once, the first one in the list wins, so you can order them from most specific to most general. When none match, the element returns to its ordinary position.
Six kinds of element take transform variants, and they do not all honour the same fields:
| Element | What a variant can change |
|---|---|
| A model | Position, rotation and scaling |
| A part inside a glTF file | Position, rotation and scaling, applied locally to that part |
| A directional light | Direction only |
| A point of interest | The position of the 3D marker only |
| A decal | Position, projection direction, size and spin |
| A dimension | A position offset that shifts the whole measurement rigidly. Bounding-box dimensions have none, because they follow the model already |
Models, parts and lights can move with Transition set to Animated rather than Instant, which looks considerably better when a shopper is clicking between options. Markers, decals and dimensions always apply instantly. Going back to the ordinary position uses the transition of the variant you are leaving, so a move that eases out also eases back. Moving straight from one variant to another uses the transition of the variant you are entering.
A transform variant, material variant, colour, texture or scene variant with no condition is never used, and neither is an animation rule unless Always play (ignore conditions) is ticked. A model, part, light, marker, dimension or decal with no condition is always there. If a transform variant appears to do nothing at all, check that it actually has a condition on it.
A model with an entry under Animated rotations keeps spinning and ignores the rotation of a transform variant, while position and scaling still apply. Pick one.
Animations baked into the file
If your glTF contains animation clips, you decide when they play. A hatch that slides open when the shopper selects it, or a fan that spins while a particular mode is chosen. A clip with no playback rule does not play.
You can preview a clip in the editor with a play button rather than guessing which one is which. The rules themselves - whether a clip runs while a condition holds or fires once when something changes, how it loops, how fast it runs and what happens when it stops - are set in Model Properties.
Lights that come and go
A directional light can carry a condition of its own, so it is only on while that condition holds. A light with no condition is always on.
This is how you light a configuration differently rather than uniformly: a directional light that only comes on once a particular option is chosen, or a second fill light for the darker finishes. Lights also take transform variants, which swing the light direction rather than moving anything solid.
Both are set up in the Scene section, on the light itself.
Markers, dimensions and decals
Three more things carry conditions, and they are easy to forget because they are configured elsewhere:
- Points of interest: a marker appears only for the configurations where the feature it points at exists. Set in Navigation.
- Dimensions: a measurement is drawn only while its condition matches, so a dimension can come and go with the part it belongs to. Set in Dimensions.
- Decals: an image or a piece of text is projected onto the product while it has content to show and its condition, if it has one, matches. Set in Personalisation.
Focals, the camera moves, are also condition-driven, but they behave differently enough to be worth reading about separately in Navigation: they fire at the moment their condition becomes true rather than staying applied while it holds.
The look of the surroundings
A scene variant changes the sky, the ground and the background, and nothing else, so a shopper can see the boat on the water or in a studio. One variant shows at a time: the first whose condition matches. With no match the scene stays as you built it. Environment covers them, and Show it off builds two.
Writing the conditions
Every kind of variant uses the same condition editor, so you learn it once.
The simple form is a list under Simple matches (all must be true). Press Add variant match, then choose a Name and a Value. Add more rows and all of them must hold. That covers the large majority of cases.
Tick Use advanced variant logic to combine conditions, so a part can appear only when Length is 25 m and Planks is Silver teak, or when either of two options is chosen. You build these as nested groups rather than by writing anything.
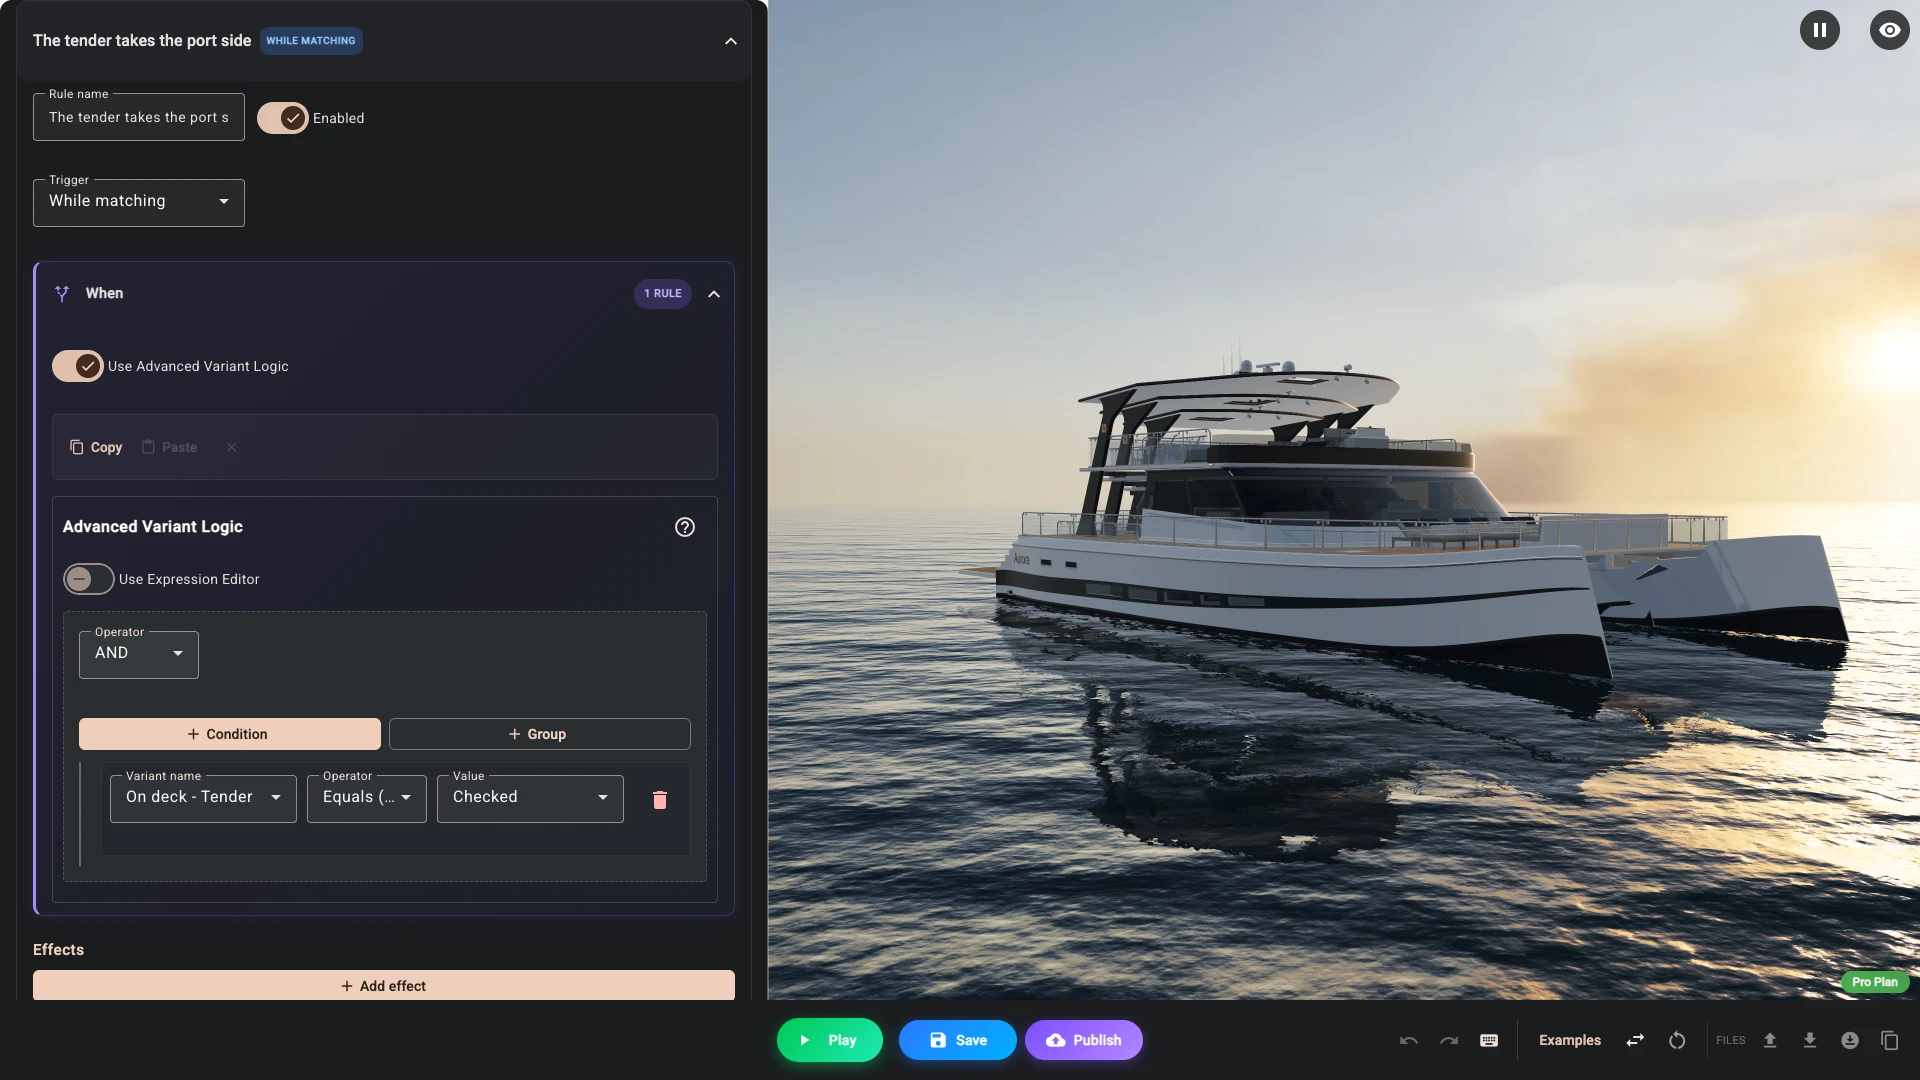
Both of those ignore capitals on Equals (==), Not equals (!=), Includes and Not includes, so Sport and sport are the same thing. The greater and less operators are meant for numbers.
There is also a free text form for the rare case that neither shape fits: tick Use expression editor and write in Logical expression. It compares values exactly, capitals included, unless you use contains, and anything it cannot read makes the whole expression false, so reach for it last. Expressions has the language.
Once the scene has controls, the name is a list of your controls: it shows each control's label and stores its key. Each option of a multi-select checkbox is its own entry, such as On deck - Tender, with the values Checked and Unchecked. In the advanced form the same field is called Variant name.
Renaming a key from the Controls tab rewrites every condition, expression, trigger list and translation that names it exactly, so a rename does not quietly leave a rule pointing at nothing. It does not change the code of your scripts, or links and orders made before the rename. See Controls for what a key is and where else it travels.
A Logic rule can overrule these conditions while it matches: it can force a model, a part, a marker, a dimension, a decal or a directional light on or off, pick a material variant from the file, or pick one of your colour or texture entries.
Getting the parts right in the first place
None of this works if the parts are not separate in your 3D file. If the helm and the deck are one merged object, no rule can show one without the other.
Open Nodes early, before you build anything. Composer parses a glTF or GLB file when you add it, and Parse structure does it again. It lists what is actually inside the file. If the parts are not there, the fix is in the software that made it, not here.
Checking your work
Press Play and click through every option. Edit mode and Play do not show you the same thing, and knowing which is which saves a lot of confusion: models and parts, for instance, are all shown in edit mode regardless of their conditions, while dimensions already obey theirs.
Edit Mode and Play has the full table: what applies where, and how to preview each kind while you are still authoring.
Once you are in Play, watch particularly for two things: a part that stays visible when it should be gone, which usually means a missing condition, and two parts appearing in the same spot, which usually means two rules both match.
If something still will not behave, Troubleshooting works through the usual causes.
Verified against the product in November 2026