Personalisation
On Base and Standard this section stays closed, and neither the product page nor Play draws the decals a project holds. Publishing does not refuse them: they simply do not appear.
A shopper types their boat's name and sees it on the hull. Not next to it in a text box, but on it, following the curve of the surface, in the position it will actually be painted.
That is what personalisation does, and it is the difference between "we will sign-write this for you" and a shopper who can already see theirs.
The section holds a list of decals. Each one is either an image decal or a text decal, and each one is bound to a control in your panel. Add text decal and Add image decal start one, and you can name them, reorder them, clone one to make a near-identical second, and remove them. Show it off prints the boat's name, one decal for each length.
Text
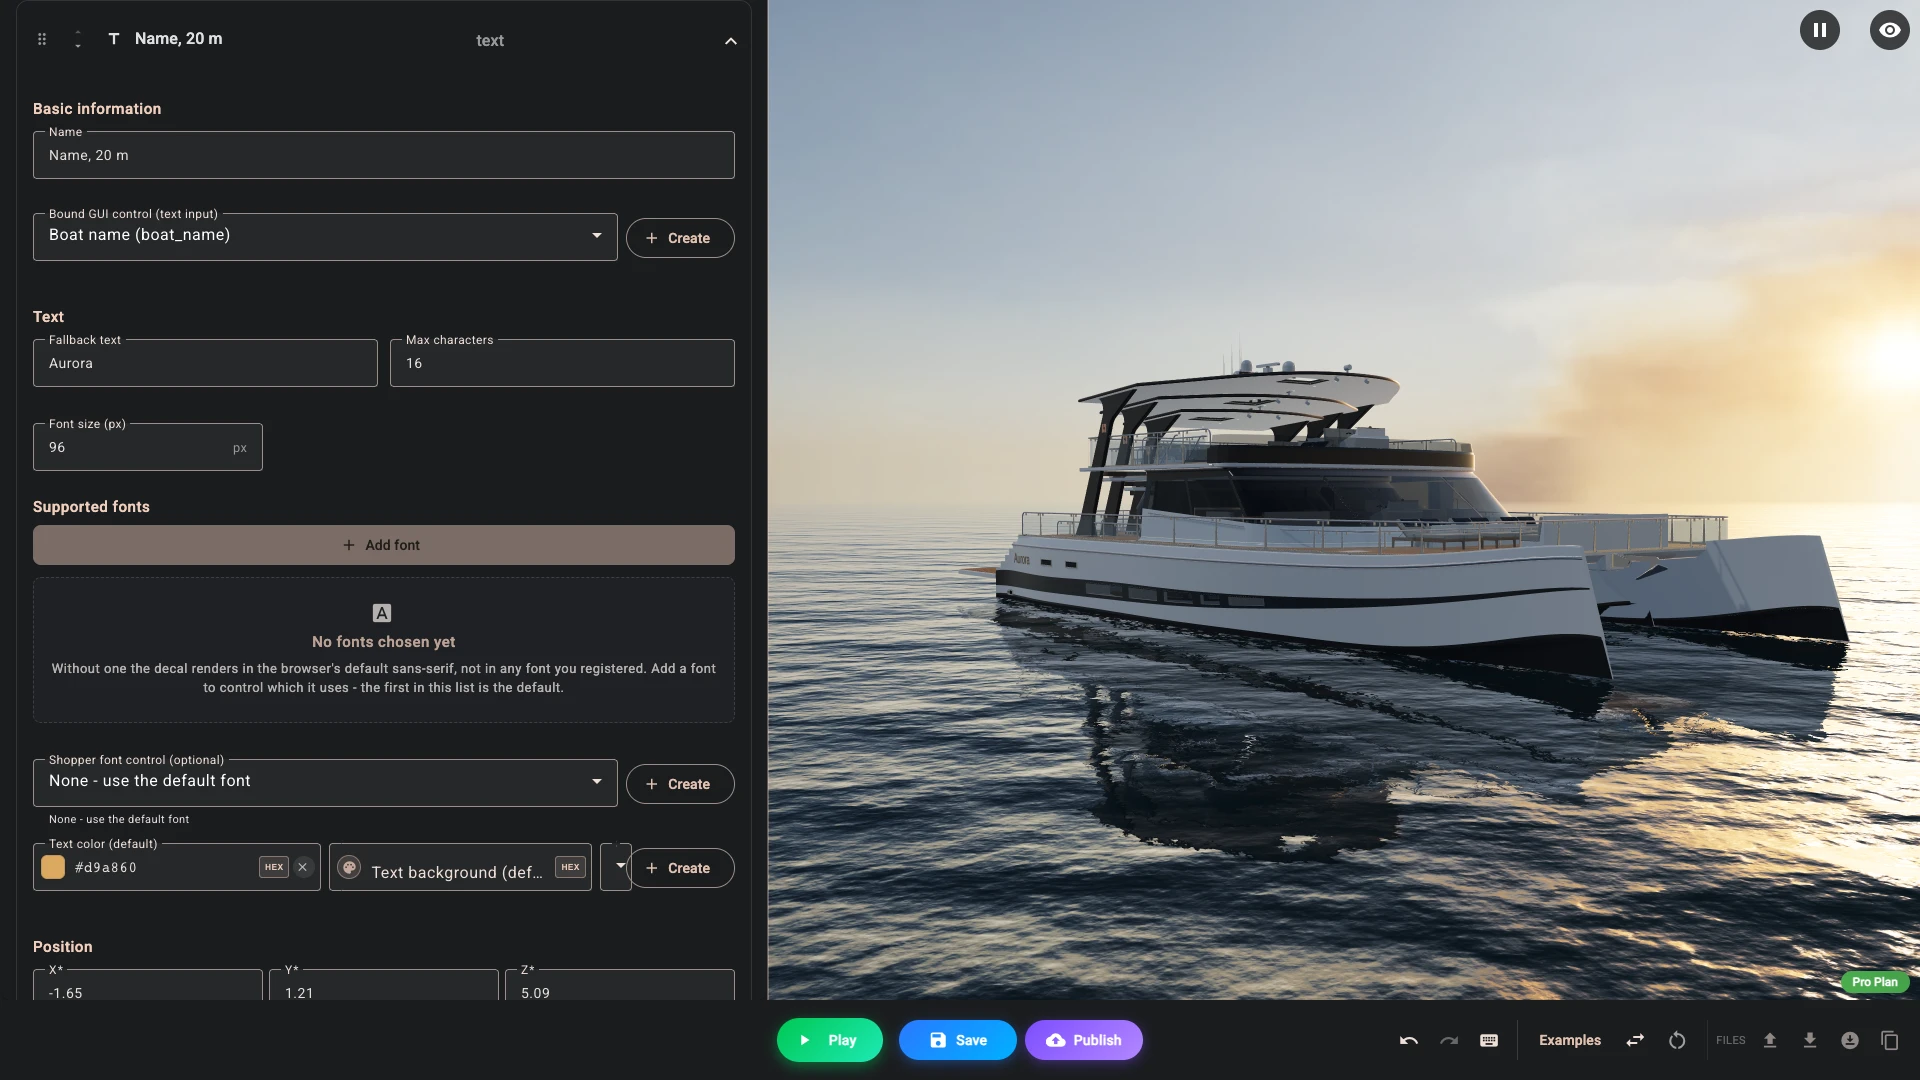
Add a text decal and bind it to a control. Whatever the shopper types appears on the model.
A text decal accepts a Text or Textarea control. The Create button beside the field makes a control of the right type and takes you to it on the Controls tab, ready to draw on the product page.
Three fields shape what is drawn:
- Fallback text is what appears before the shopper has typed anything. Leave it empty and nothing is drawn until they type.
- Max characters truncates what is drawn. It is a safety net on the decal, not a limit on the field, so set Max length on the control as well if you want the shopper to be told.
- Font size (px) sets how sharp the lettering is, not how big it prints: the text always fits itself to the box, so a long name prints smaller. Raise it if large lettering looks soft.
A decal prints one centred line, so a line break typed in a Textarea does not reach the model.
Fonts and colour
Fonts are registered once for the whole project, in the Style tab of the GUI section, and the same list serves text decals, your panel's typography and any font picker control. Personalisation has a Manage fonts button that takes you there, and shows you which fonts are currently registered.
Each decal then has its own Supported fonts list, chosen from that registry. The first one in the list is the default, and you can drag them into the order you want. If you leave the list empty, the decal renders in the browser's default sans-serif rather than in any font you registered, so add at least one if the lettering matters.
To let the shopper choose, bind a Shopper font control (optional), a Dropdown or a Radio. Create builds one with an option per supported font and variant. If you later add or remove a supported font, the control's options no longer match, Composer says so, and Sync rewrites them.
Colour works the same way: Text color (default) to use by default, and an optional Shopper color control (optional) that overrides it live. Text background (default) fills the whole box behind the text.
Images
An image decal works the same way, with the picture coming either from you or from the shopper.
An image decal binds only to a File control: that is the one control type the field offers. The shopper uploads a logo, and it appears on the product. With Attach the uploaded file to the order (customer file reaches you as a link) ticked on the control, as it is by default, the file travels with the order, so you have the original to print from.
Until Add to cart, the file stays in the shopper's browser, which keeps a copy of their recent uploads so a configuration can be reopened there. At Add to cart it is uploaded to Shopify with the cart line, and the order carries its link. 3D Bits never receives the file, and how long it stays available is up to Shopify. Uploaded images, and why they are held back says which links carry it.
For a fixed set of designs, do not try to bind the decal to a dropdown; it will not accept one. Instead make one decal per design, give each its Fallback image URL (used when no upload) pointing at that artwork, and put a condition on each so only the right one is showing. The shopper picks from an ordinary dropdown of your own making, and you never have to accept an arbitrary upload.
The fallback URL is also the sensible default for an upload decal on its own: it is what the model shows before anything has been uploaded.
An uploaded file reaches you only from a rendered File control with the option above ticked. It goes through the platform's own cart upload, which the accelerated checkout buttons on the product page - Shop Pay, Apple Pay and the like - do not carry. The default Theme product controls setting, Smart - hide what the configurator replaces (recommended), hides those buttons when your configuration saves data on the order. Only Show everything leaves them up, and then the file will not arrive. The upload is set up on the control, not the decal - see Controls.
Recolour
One piece of artwork can serve every colour you sell. Set Recolor mode on an image decal and the colour comes from you, or from the shopper, rather than from the file.
There are two modes.
Solid color - repaint every visible pixel is the right choice for a flat one-colour logo or a monogram.
Multiply - tint, keeping the artwork's shading keeps gradients and shadows. It cannot lighten, though: multiplying a black logo by any colour leaves it black. Color (default) starts black, so pick a colour or the artwork prints black.
Both modes read the shape of the artwork from its transparent background, so this needs a PNG with real transparency. A logo saved on a solid white background cannot be recoloured: the whole square is opaque, so the whole square gets painted.
As with text, you set a default colour and can optionally bind a Shopper color control (optional). Recolouring is instant when the shopper changes it, with no reprojection.
Placement
Decals project onto the surface, so they follow curves rather than floating flat. On a curved hull, that is what makes it look real.
A decal is positioned by a projection box, described by three fields:
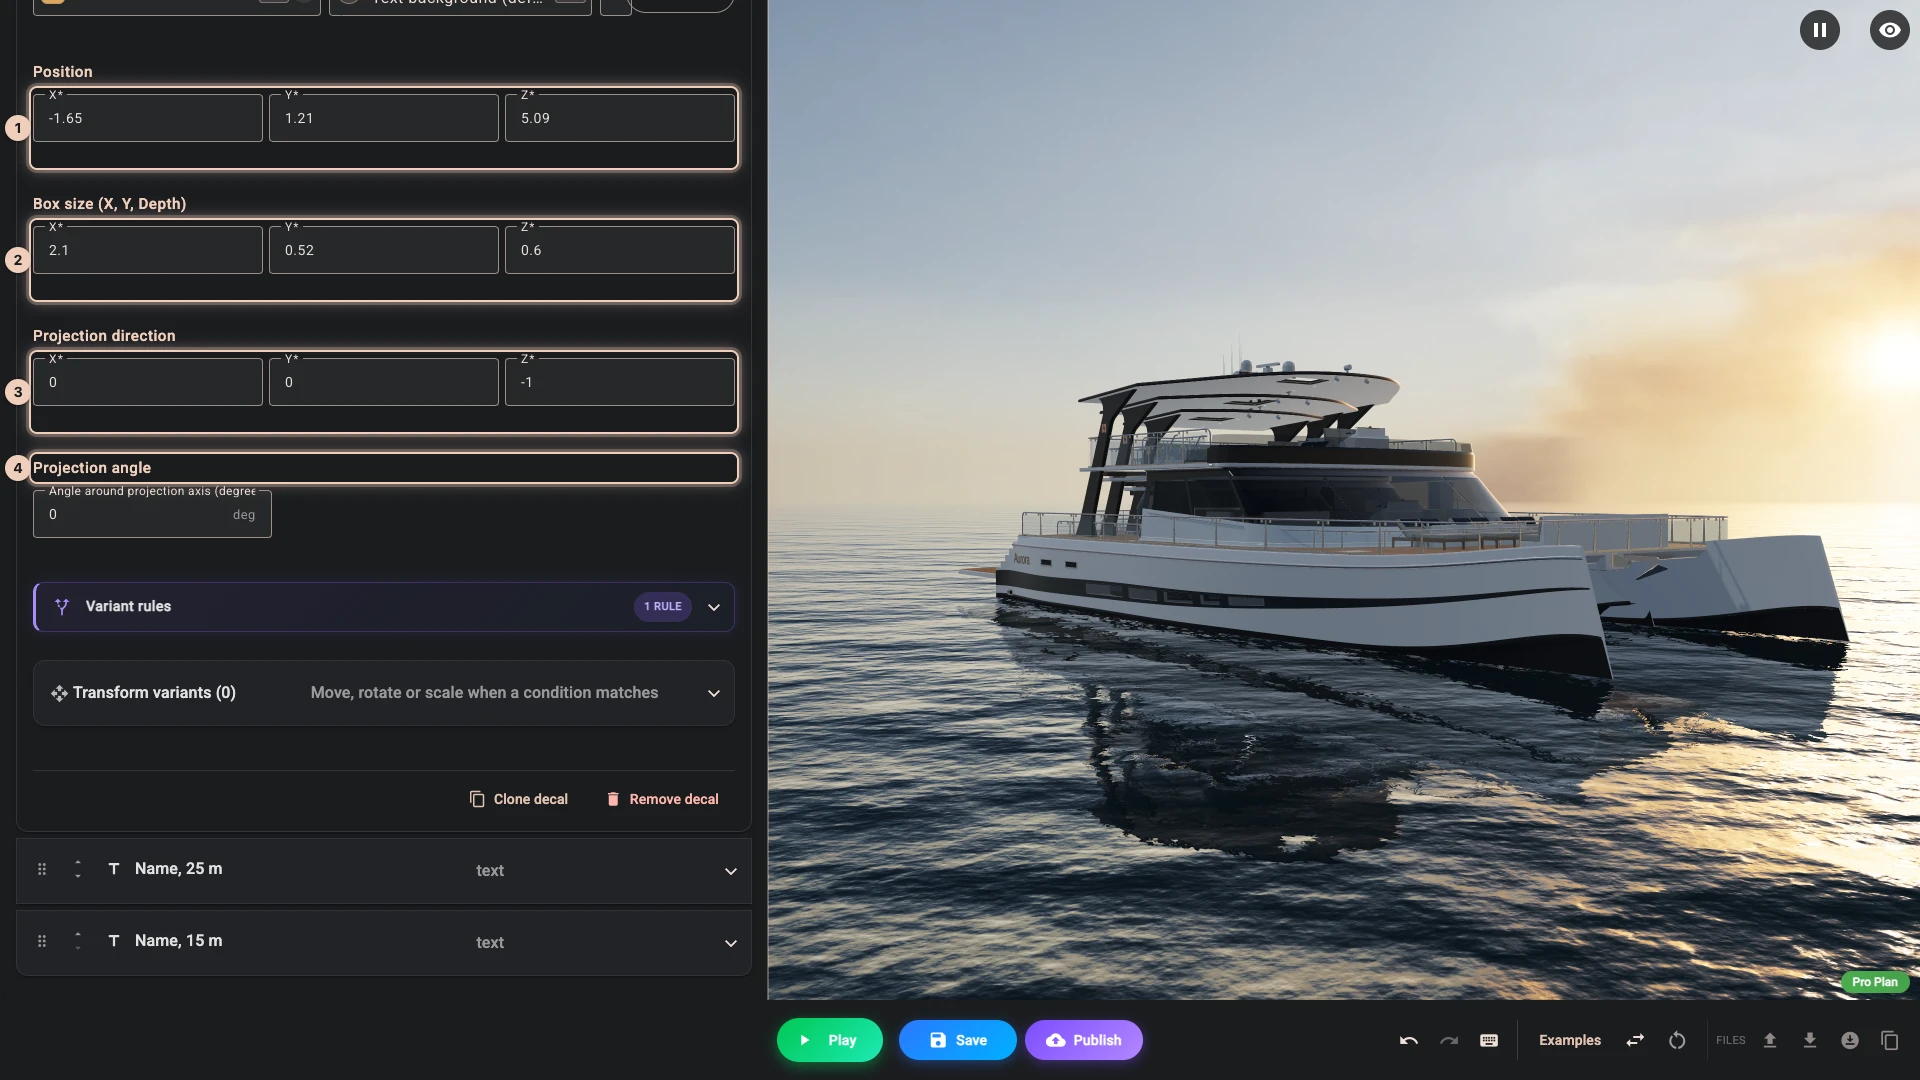
- Position 1 is where the centre of the box sits.
- Box size (X, Y, depth) 2 sets how large the decal is and how deep it projects. Depth matters: the decal only lands on surfaces the box actually reaches.
- Projection direction 3 is the direction the box projects along, which is what makes the artwork wrap correctly rather than smear.
You can type these numbers directly, and you can drag them. Clicking into Position or Box size (X, Y, depth) raises a move gumball and a scale box together, and Projection direction raises a direction handle, so typing and dragging are two ways at the same value.
Separate from the direction is the Projection angle 4, a single number in degrees. It spins the artwork around the projection axis without changing where the box points. Getting the direction right is what makes the wrap look correct; the angle is how you get the lettering level once it does.
A decal lands on every visible mesh the box overlaps, across every model you loaded, though not on geometry a script builds. It is not tied to one model, which is what lets a logo cross a seam between two pieces of the model, and also why it is worth checking the result from several angles once the box is roughly right.
Like everything else, decals can be conditional, so each length of boat shows its own decal. They can also carry transform variants, so the same decal can move, resize or spin when the configuration changes rather than needing a second decal.
Practical advice
Set limits on the text. A name field with no length limit will receive a paragraph, and it will print too small to read. Set Max length on the control, and check the longest allowed string still looks right.
Decide what you will accept before you offer uploads. A shopper uploading a photograph for sign-writing will be disappointed by the result. Set Accept on the File control, for example image/png. Accept limits what the file picker offers; it is not a security check, so treat every uploaded file as untrusted. Say what works, in a Message element next to the control, before they upload rather than after they order.
Charge for it. Personalisation is work, and a personalised item is hard to resell. Attach a price to the option that enables it.
Check it in Play. Type the longest name, the shortest name and an awkward one with unusual characters, and look at all three on the model. Conditional decals need Play, as edit mode draws them all.
What your workshop sees
The shopper's text and their uploaded file both travel with the order. The Order review page shows the text and links the file. If you set up an order PDF under PDF reports, the text is listed among the options there. The uploaded file is not in the PDF, so take it from the order.
Verified against the product in November 2026