Settings
A shopper spends ten minutes building a boat, and then either buys it or closes the tab. Settings is the tab that decides how much of that work survives either way.
It holds two things and nothing else, and both are available on every plan:
- an Order snapshot - a picture of the configured product, attached to the order;
- a Shareable link & URL - the shopper's choices kept in the page address, plus a link on the order that reopens the exact configuration.
Everything here is storefront behaviour. Nothing in this tab changes what a shopper is charged.
Order snapshot
Tick Attach an image of the configured 3D scene to the order and each order arrives carrying a picture of the thing that was actually bought. It is the fastest way for whoever packs or makes the order to see what they are looking at, without opening a configurator or reading a list of option names.
These fields shape it.
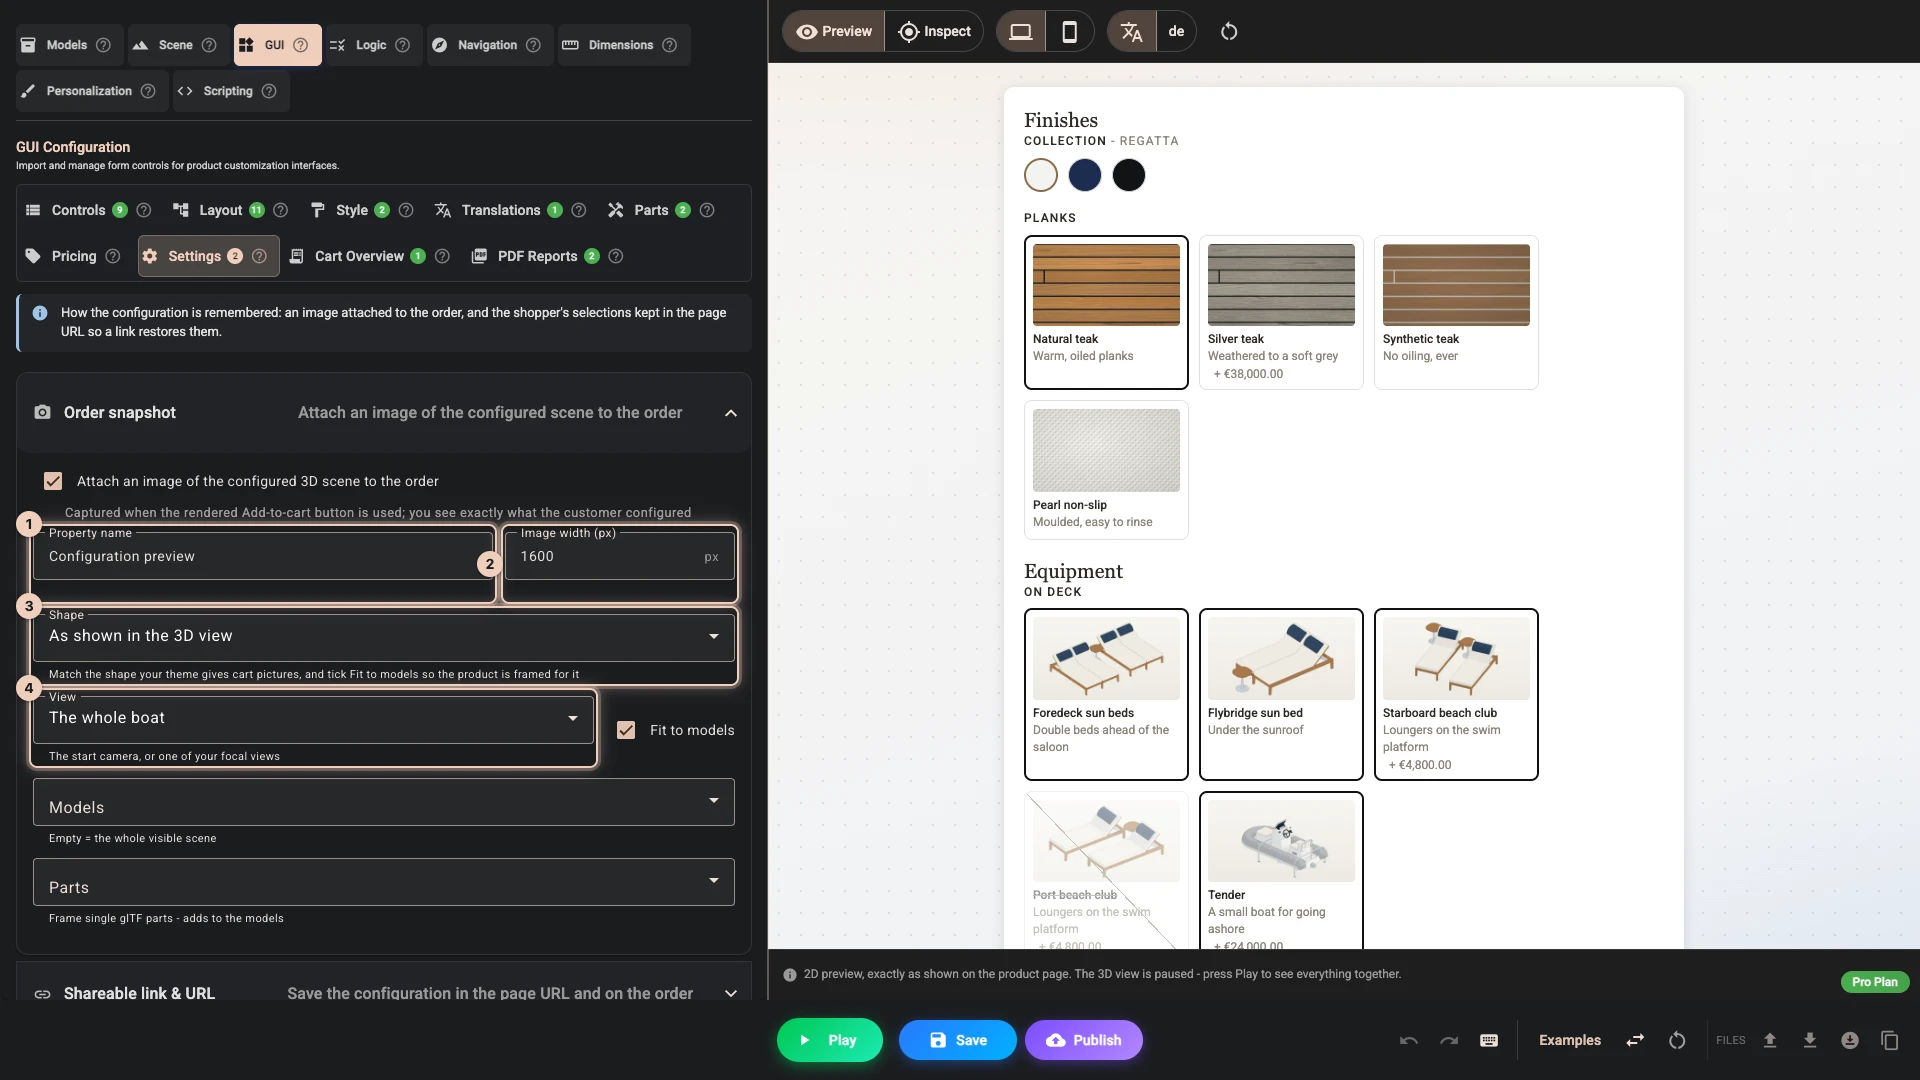
Property name 1 is what the image is called on the order. It defaults to Configuration preview. This is an ordinary line item property rather than a hidden one, so the shopper sees the name in their cart as well - keep it presentable.
Image width (px) 2 sets how wide the captured picture is, 1024 when left empty. The height follows the shape below, so you only set one number. Bigger is slower to produce on a phone, and a workshop rarely needs more than a screen's worth of detail.
Shape 3 fixes the picture's shape, its height following the width; As shown in the 3D view, the default, keeps the 3D view's own. In the shopper's own browser, the cart shows the snapshot in place of the product's own picture, and many themes cut cart pictures to a shape of their own, so a picture of another shape loses its edges. Pick your theme's shape - Portrait 4:5 where cart pictures stand upright - and tick Fit to models below, which frames the product for that shape. Without it the picture keeps the 3D view's height and loses its sides, as the theme's crop would.
View 4 is where the picture is taken from: the Start camera, or one of the focals you authored in the Navigation section, such as The whole boat, as you placed its camera. A focal's own framing settings don't apply here - use Fit to models below instead. If you later delete that focal, the start camera is used and the field says so, so the image is never lost.
Fit to models keeps the view's direction but moves the camera until the models the shopper sees fill the picture. Use it when a choice swaps a small model for a much larger one, as Length does on the boat: a start camera framed for 15 m crops the 25 m boat, and one framed for 25 m leaves the 15 m boat tiny. Only the models showing at the moment of purchase count, so the framing follows whatever the shopper picked. With nothing picked below, every visible model counts, a ground plane or a backdrop too.
Models - and Parts, once a model's glTF structure is parsed in the Models section - narrow what the fit frames. Leave them empty to frame the whole visible scene. Once you pick something, Hide other models appears: tick it to leave the other models out of the picture, a ground plane for example. A picked part keeps its whole model in the picture. If none of your picks is showing when the shopper buys - hidden by their choices, or deleted since - the whole visible scene is framed and nothing is hidden, rather than an empty picture. Picks that still show keep the framing to themselves.
The picture is taken from the view you chose above - the start camera position and target you set in the Scene section, or a focal - not from wherever the shopper happened to have dragged the model. Every order therefore arrives seen from the same direction, which is what makes a folder of them readable; Fit to models keeps that direction and only moves the camera to frame the models. If your scene has no start camera position set and no focal is chosen, the shopper's current view is used instead - with Fit to models, only its direction.
The snapshot is captured at the moment the Add to cart element inside your option panel is used. If your panel has no Add to cart element and shoppers buy through the theme's own button, no image is captured. Add one in the Layout tab.
Capture is best-effort. On a slow device or a slow connection the image is skipped rather than the purchase being held up, so an occasional order with no picture is expected behaviour rather than a fault.
Shareable link and URL
Remember the configuration in the product-page URL is on unless you turn it off, and it does more than the name suggests.
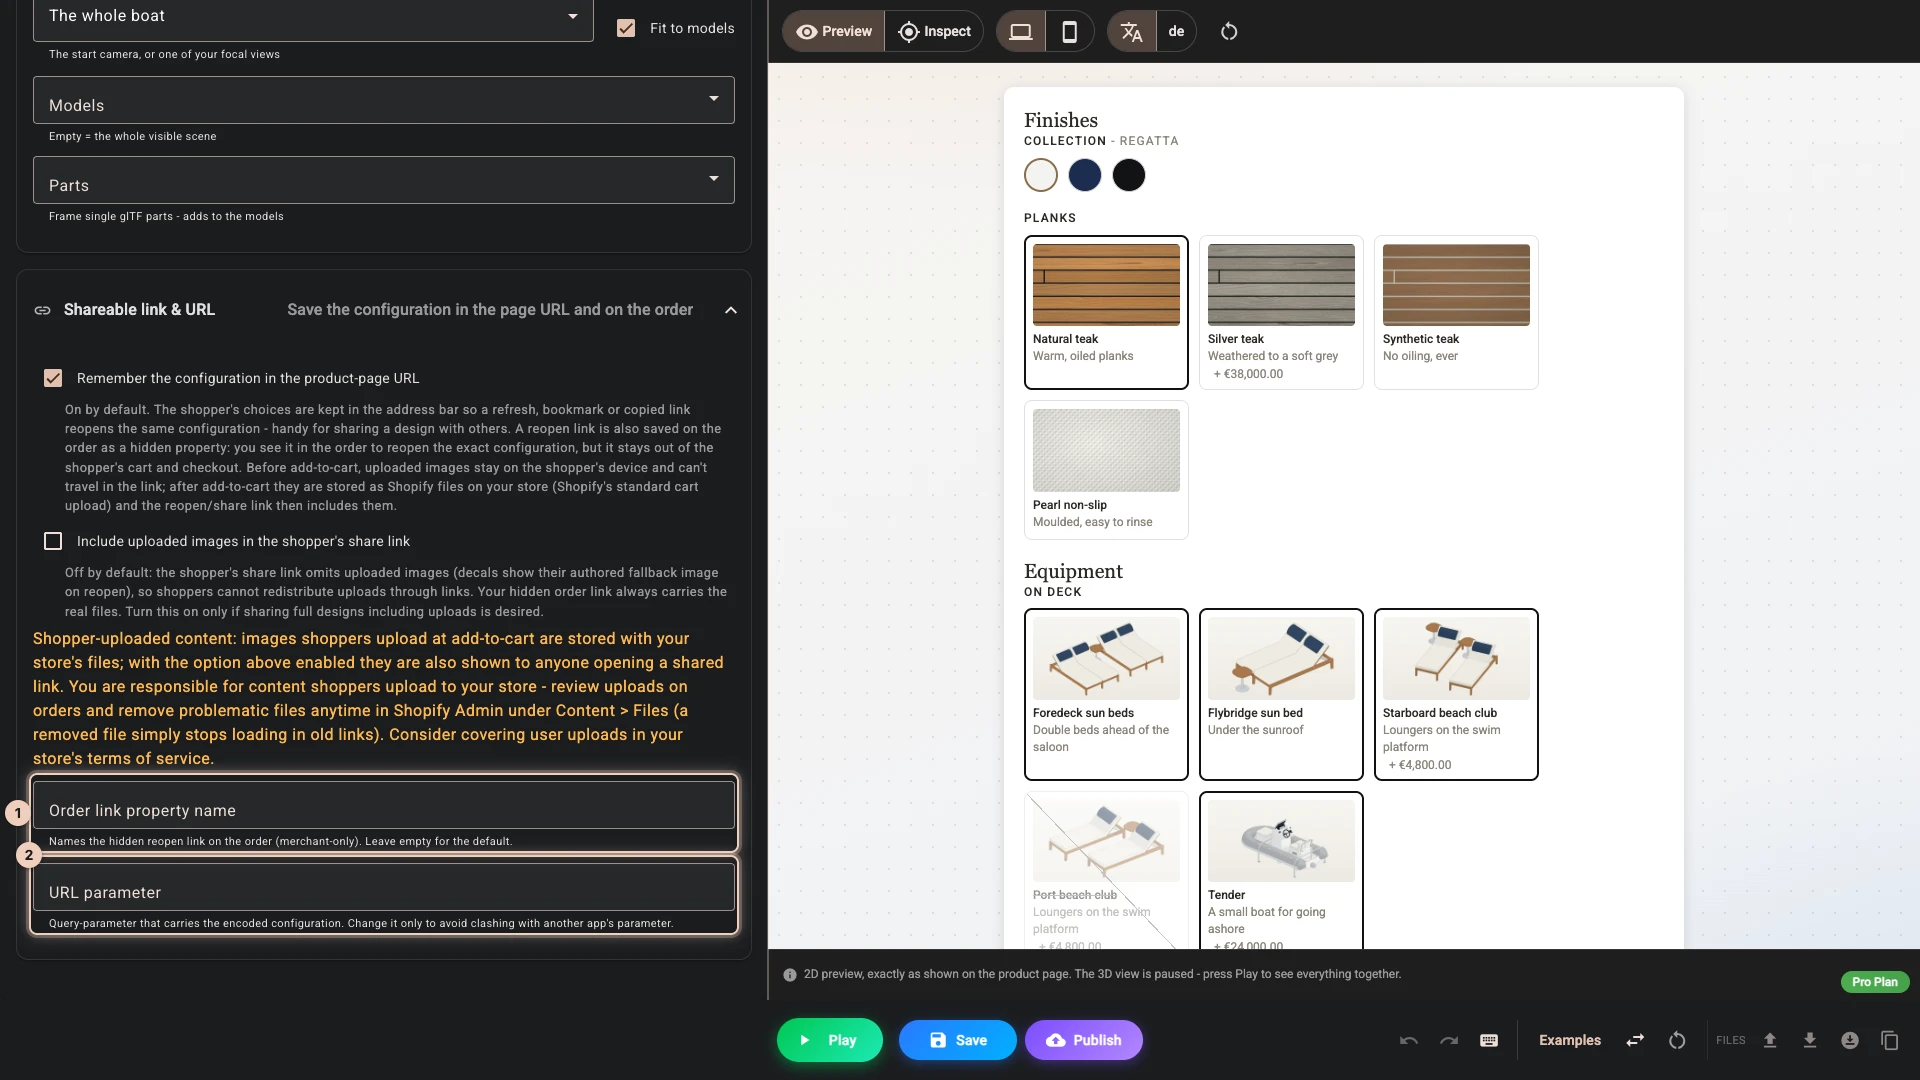
While the shopper configures, their choices are written into the page address. A refresh, a bookmark, an accidental back-and-forward or a link pasted into a message all reopen the same configuration instead of a blank product. The address is replaced rather than added to, so the browser's back button still behaves normally.
The reopen link on the order
When the shopper adds to cart, a link that reopens their exact configuration is also saved on the order.
It is saved as a hidden property: you see it on the order in Shopify admin, and it stays out of the shopper's cart and checkout. Use it to check a detail before production, to remake an item, or to answer a question about an order six months later.
Order link property name 1 names that property, and defaults to Configuration link. Leave it empty for the default.
The shopper's own share link
Shoppers get a copyable link of their own if you add a Confirmation element in the Layout tab and leave Include a copyable link to the configuration ticked. It appears after a successful Add to cart, which is what makes "send this to my partner before we order the second one" work.
Uploaded images, and why they are held back
If your configurator takes a file upload, the timing matters.
Before Add to cart, an uploaded image lives only on the shopper's own device. It cannot travel in a link at all, so a link shared at that point reopens every choice except the picture. After Add to cart, the file is stored with your store's files - Shopify's standard cart upload - and from then on the merchant's reopen link carries the real file.
Include uploaded images in the shopper's share link is off by default, and the default is the safe one. Left off, the shopper's own share link omits uploads, and a decal falls back to the image you authored when the link is reopened. That stops a shopper's uploaded artwork being passed around by anyone who receives a link. Your hidden reopen link on the order always carries the real files either way. Turn it on only if sharing complete designs, uploads included, is genuinely what you want.
Images shoppers upload at Add to cart are stored with your store's files. With the setting above enabled, they are also shown to anyone who opens a shared link.
Review uploads on orders, and remove anything problematic at any time in Shopify admin under Content and Files - a removed file simply stops loading in old links. It is worth covering user uploads in your store's terms of service.
The URL parameter
URL parameter 2 names the query parameter that carries the encoded configuration, and defaults to bb-config. Change it only if another app on the same product page already uses that name. There is no other reason to touch it.
A configuration arriving in a link is not trusted blindly. Any file address in an incoming link that does not point at your own store or at Shopify's own content delivery network is discarded before the scene is built, so a link cannot load a picture from any other website. The check limits where a picture is hosted, not whose it is, and what a link shows is seen only by whoever opens that link.
Turning it off
Untick the switch and the address bar stays clean, no reopen link is saved on the order, and the Confirmation element has no link to offer. You lose the sharing, the bookmarking and the "reopen this order" workflow. Most stores should leave it on.
Where to go next
- Layout - the Add to cart and Confirmation elements this tab depends on.
- PDF reports - a fuller record of a configuration than a single picture.
- Pricing in the Panel - where the shopper's choices are also written onto the order as readable properties.
- Personalisation - the file uploads the sharing rules above are written for.
Verified against the product in November 2026