Navigation
On Base this section stays closed, and neither the product page nor Play draws the markers or focals a project holds. Publishing does not refuse them: they simply do not appear. Subscription plans lists what each plan includes.
Shoppers looking at a 3D product rarely find the good bits on their own. They spin it once, see the outside, and move on. Navigation is how you take them to the parts worth seeing.
The section has two lists, Points of interest and Focals, and both can be reordered, cloned and named. A third tab, Camera motion, sets how the camera travels whenever either of them moves it. Show it off builds the boat's focals step by step.
Points of interest
A marker on the model that a shopper can click. Clicking it flies the camera smoothly to a view you chose, with the motion set under Camera motion.
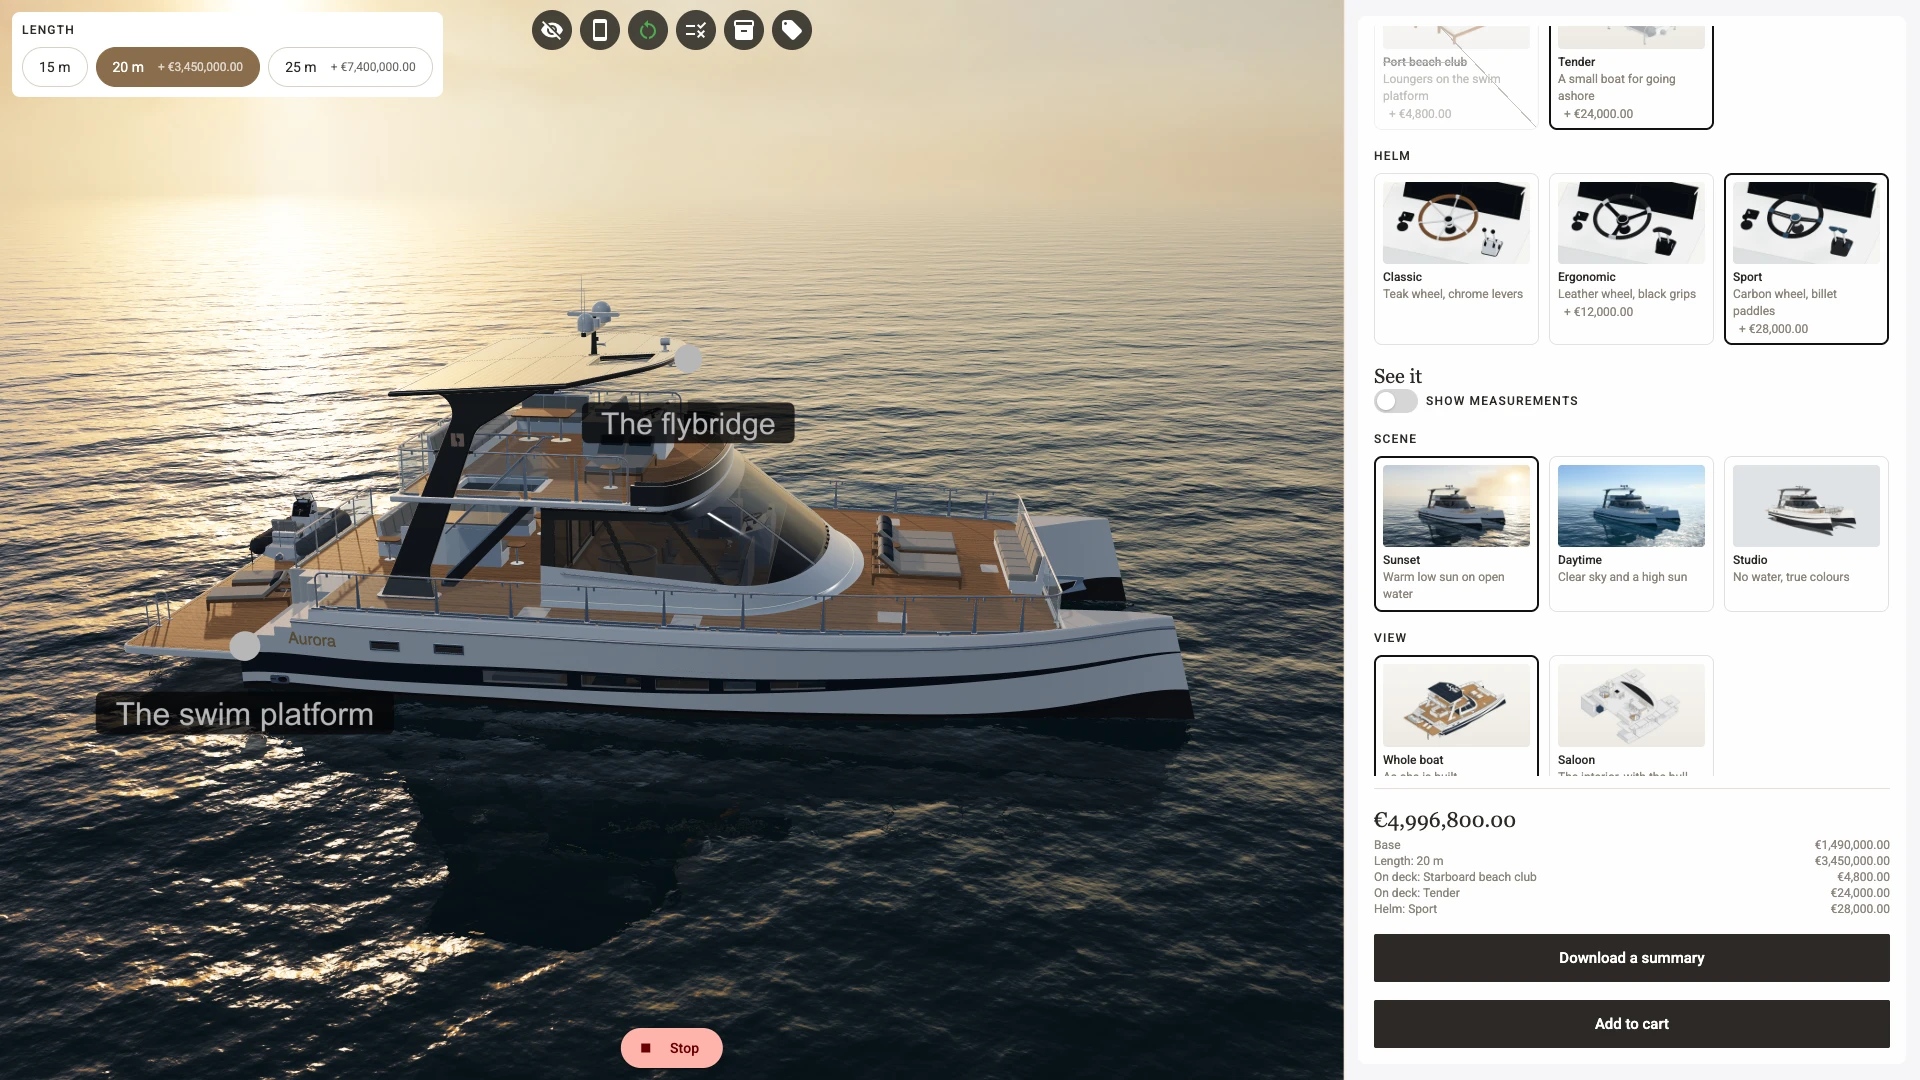
Use them for the things you would point at if the shopper were standing next to you. The flybridge. The swim platform at the stern. The detail nobody expects to be there.
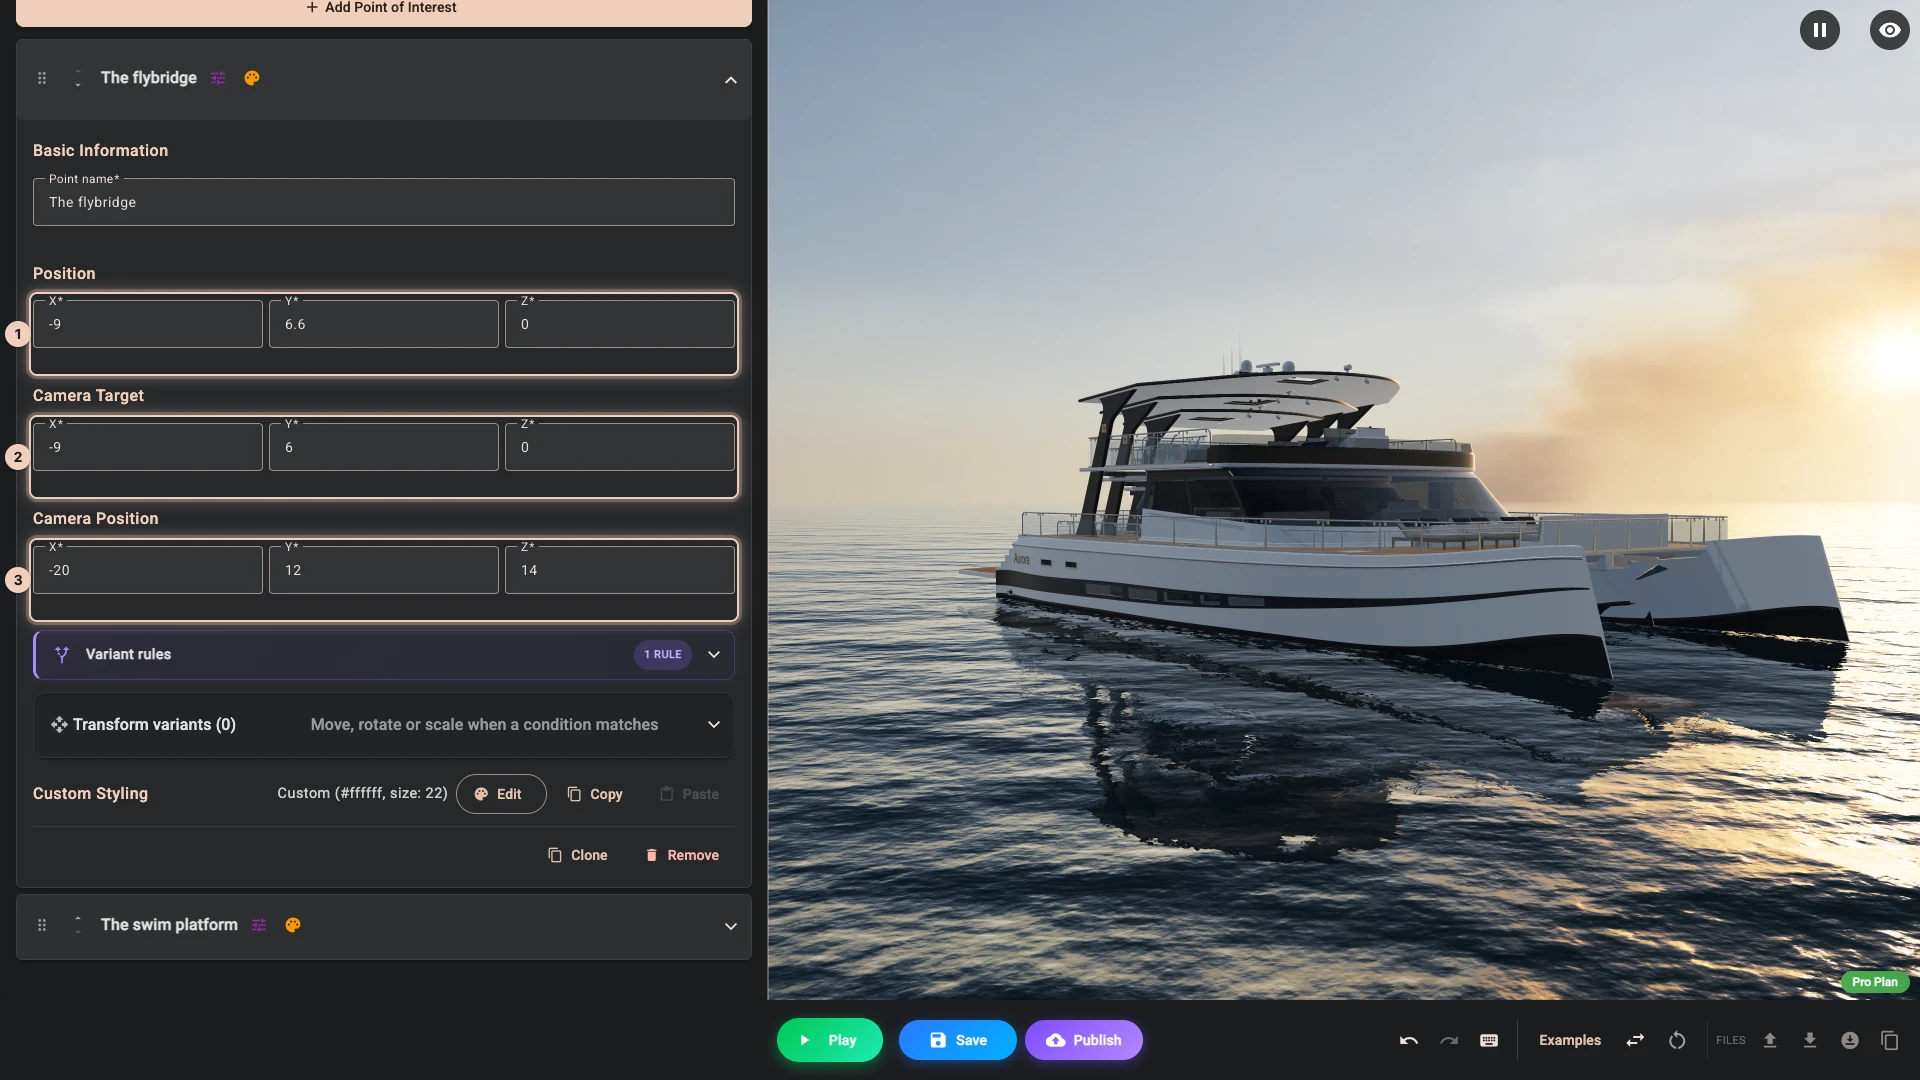
A marker is described by three sets of XYZ coordinates, and these fields are the real control:
- Position 1 is where the marker sits on the model.
- Camera target 2 is what the camera looks at once it arrives.
- Camera position 3 is where the camera flies to.
Click into any of the three and the matching handle appears in the 3D view, so you can drag it and watch the numbers follow. Dragging is the quick way to get close; typing is how you make two markers agree exactly, or nudge one by a known amount. While one of a marker's handles is active, a Focus point of interest camera button appears over the 3D view and flies the editor camera to that marker's view, which is the honest way to judge the shot before a shopper sees it.
Markers can be styled - colour, size, the pulse that draws the eye, the label's text and background - and a style can be copied onto the others so a set stays consistent. They can also be conditional, appearing only when the option they relate to is chosen. There is no point marking the tender when the shopper has left it off.
A marker can additionally carry transform variants, which move it when a condition matches. That saves duplicating a marker just because the feature it points at slides along with a size change. Only the position moves; the camera view stays as authored.
Give each marker a name. It is what the shopper sees on the label, what the Logic section lists when you target it, and one of the strings you can translate for the languages you sell in.
The camera motion is deliberate rather than instant, because a jump is disorienting while a move keeps people oriented. Clicking a marker when the camera is already at its view does nothing. A second click during the flight starts it again from where the camera has got to.
Focals
A focal is the same camera move without a marker. Instead of waiting to be clicked, it fires by itself when something changes.
The shopper picks Silver teak, and the camera comes up over the decks. They pick 25 m, and the view pulls back so they can see the whole boat.
This is one of the most effective things in the tool, because it answers a question the shopper has not asked yet. They change an option, and rather than hunting for what changed, they are shown.
A focal has a Camera position and a Camera target, edited exactly like a marker's, with the same handles in the 3D view. Click into either, or a handle, and a Preview focal button appears over the 3D view that flies the editor camera to the view it would use.
Triggers
A focal fires on a transition rather than continuously: it moves the camera at the moment its condition becomes true, not repeatedly while it stays true. A condition already true when the page opens does not fire it.
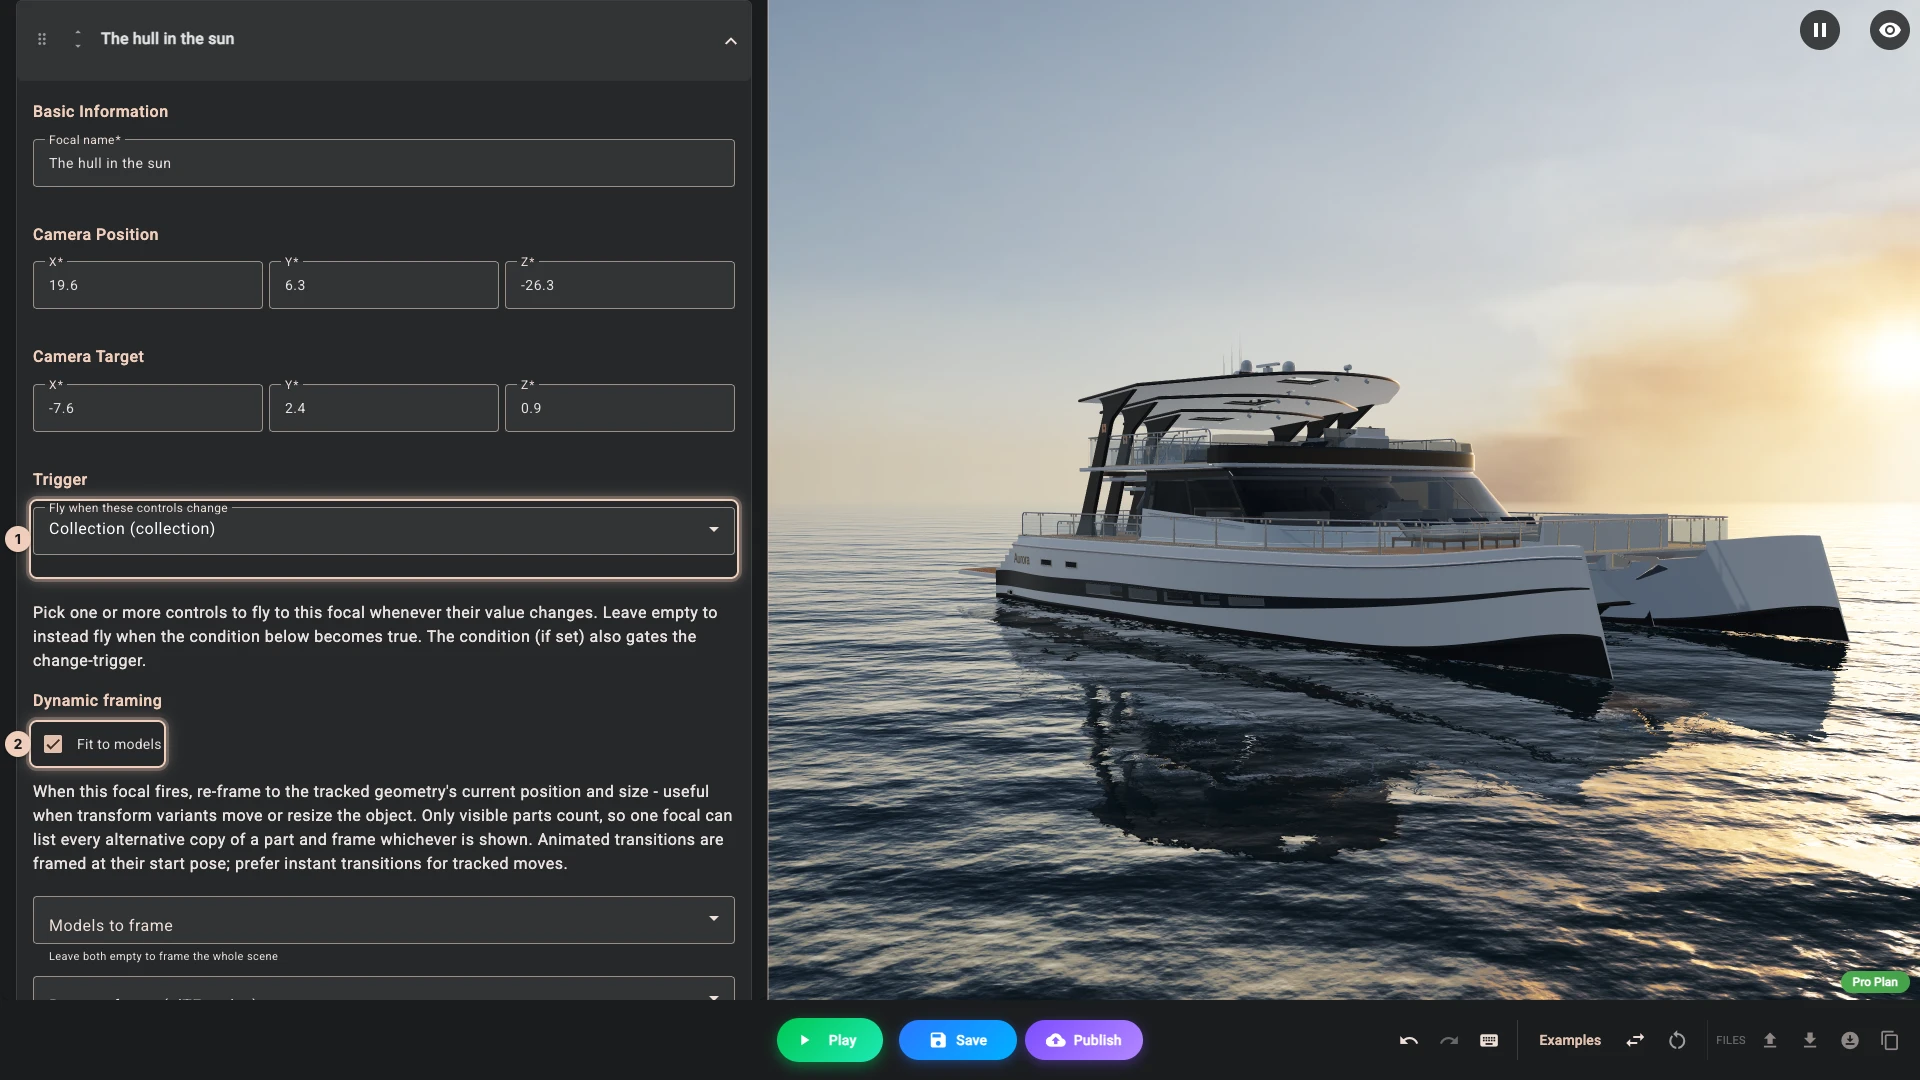
The alternative is Fly when these controls change 1, where you name one or more controls and the focal fires whenever any of their values changes at all. This is the way to react to something like a free text field, where there is no fixed value to match on: the boat's name flies the camera to the hull this way. If you also set a condition, it gates the change trigger rather than replacing it: the control has to change and the condition has to hold. A value the configurator moves by itself, because a rule hid the picked option or stock ran out, does not fire it.
A focal with neither a condition nor a control never fires. If several focals could fire at once, the first in the list wins, so order matters.
Dynamic framing
A focal's camera view is a pair of fixed coordinates, which is a problem for a product that changes size. Frame the 15 m boat nicely and the 25 m boat runs off both edges of the screen.
Tick Fit to models 2 and the focal becomes dynamic. When it fires, it keeps the direction you authored - the angle the product is seen from - but recomputes where the camera sits and what it looks at, so the tracked geometry fills the frame at whatever size it currently is.
You then choose what it should frame:
- Models to frame picks whole models.
- Parts to frame (glTF nodes) picks individual parts inside a model, once you have parsed that model's structure. The two selections add together.
- Leave both empty and it frames the whole scene.
Only visible geometry counts. A part switched off by a condition, or a whole model hidden by its variant rules, does not take part in the measurement. That is what lets one focal serve every version of a product: the boat's focals frame whichever of the three boats is showing, where you would otherwise need a focal per length, each with its own condition.
The measurement is taken at the moment the focal fires: if a transform variant is moving something with an animated transition at that instant, the focal frames where it started, not where it is going. For anything a focal tracks, an instant transition gives the correct shot.
Distance
A fitted focal lands where the framed parts just fill the view, with a small margin. Distance scales that: 1 is the tight fit, 2 puts the camera twice as far away, 0.7 crops in closer (however small the value, the camera stops just outside the framed parts rather than entering them). Because it is relative to the framed geometry rather than a fixed number of metres, one value looks right at every size the product can take.
Camera direction
By default a fitted focal keeps the angle you authored with its Camera position and Camera target, and only recomputes distance and target. Set Camera direction to Shopper's current view and it keeps the angle the shopper is looking from instead: it re-centres on the framed part and moves in or out to fit, so the view does not swing round on them. This is the gentler behaviour when a shopper is already examining the product and changes an option, and it pairs well with Distance. If there is no live camera to read (it always exists in Play and on the storefront), the authored angle is used.
In edit mode, Preview focal frames every copy of a listed part, because edit mode shows all geometry regardless of conditions. Press Play to see the focal frame only what the shopper sees.
Camera transition
A focal normally travels with the shared motion set under Camera motion. Tick Override the shared camera motion to give this one focal its own Duration (ms) and Easing: a slow, gentle reveal for the option that changes the whole product, a quick snap for a detail a shopper toggles often. The override is stored in full, so a focal that says "2000 ms" keeps saying it even if you later shorten the shared motion. Untick it and the focal follows the shared motion again; the values you typed stay in the form until the scene is reloaded, but are not saved or used.
Camera motion
Every camera flight the configurator makes - a fired focal, a clicked point of interest and, in a scene with at least one focal, the fly home when a button set to Reset all options to defaults is pressed - shares one motion, set here.
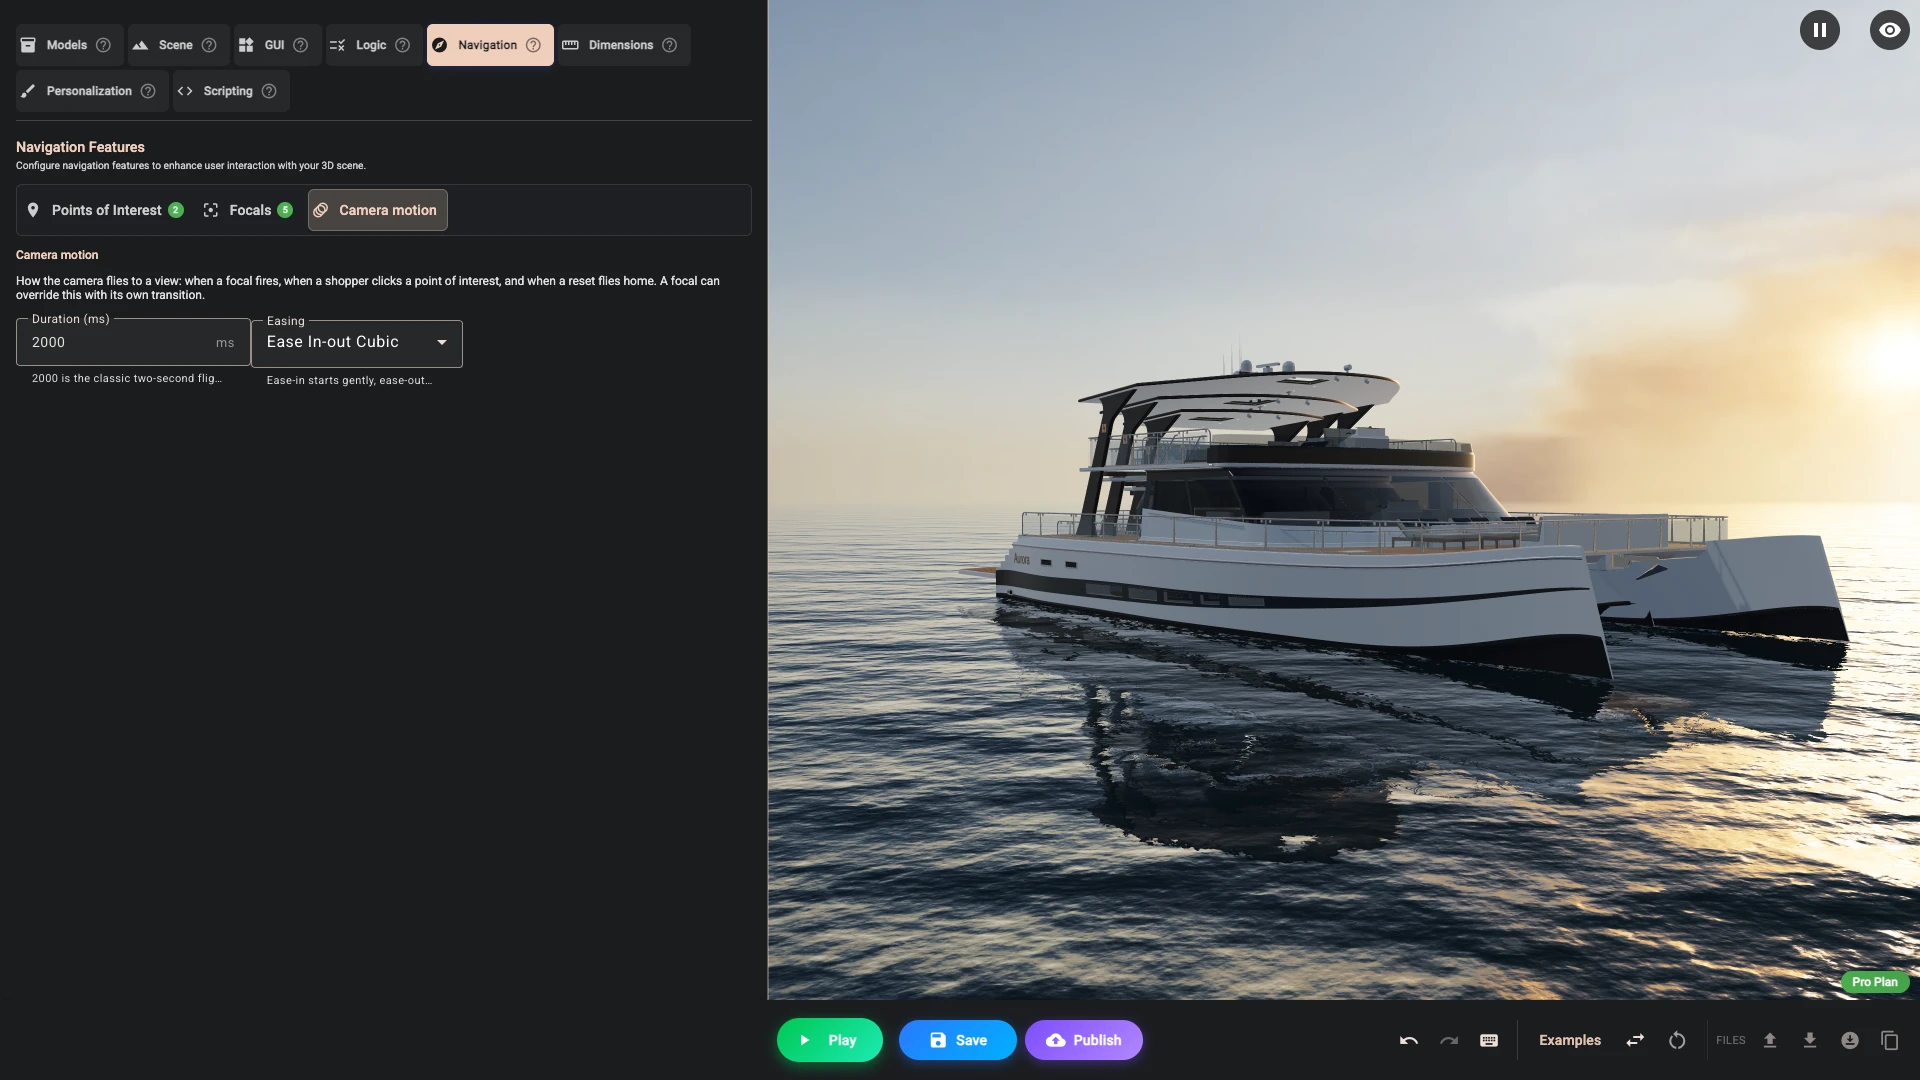
Duration (ms) is the flight time in milliseconds. The default, 2000, is a two-second flight. 0 jumps to the view with no animation at all, which is what you want for a "compare A / B" pair of focals where the motion would only get in the way. The upper limit is one minute.
Easing is the curve the motion follows between its start and its end. The names come from the bitbybit math library, and each is built from two parts:
| Part | What it does |
|---|---|
| Ease in | starts gently and speeds up: the camera leaves the current view softly |
| Ease out | starts fast and slows into the destination: the arrival is soft |
| Ease in-out | both: the classic camera glide. Ease in-out cubic is the default |
| Sine, Quad, Cubic, Quart, Quint, Expo | how pronounced the curve is, from the mildest (Sine) to the sharpest (Expo) |
| Circ | follows a circular arc |
| Back | overshoots the destination slightly and settles back, a little "pull in" at the end |
| Elastic | overshoots and springs a few times before settling |
| Bounce | arrives like a dropped ball, bouncing on the destination |
The last three are effects, not glides, and they describe the ease out forms: ease in puts the effect at the start of the flight, and ease in-out at both ends. They can be delightful on a product that is playful and irritating on one that is not. Try them in Play with the real duration before deciding, because a bounce that reads as fun over 600 ms reads as broken over 3 s.
Preview focal in edit mode uses the focal's real duration and easing, so you can judge the motion without pressing Play. Clicking a marker in edit mode does not, because markers do not fly in edit mode at all - see below.
If you edit the JSON directly, the shared motion and a focal's override are saved under navigation.cameraTransition and navigation.focals[].transition, as durationMs and easing. A focal without its own follows the shared motion; without a shared motion, the built-in two-second one applies.
Two elements can fly differently. The Camera controls element's zoom buttons and axis handles take a short 350 ms move of their own, because a click on a button should answer quickly, and the element can be given its own duration and easing. Those controls, together with the switches under Shopper pointer input in the Scene section, are also how you give shoppers a way to move the camera once the default dragging is switched off. The Screenshot element has Custom flight to the named views.
Both are edit-time invisible
In edit mode, markers and focals do not behave as they will for a shopper, because conditions are not applied while you are working. Markers appear regardless of their conditions so you can position them, and focals never fire.
Press Play to see them work properly. Edit Mode and Play lists which behaviours apply where.
If a marker or a focal handle seems to be missing in the editor, check the debug panel: the eye button in the top right of the 3D view opens and closes it (tooltip Hide debug info or Show debug info), and its Debug geometry group has a checkbox for each kind the scene contains: camera, lights, points of interest, focals and decals. Turning one off hides the editing aids for that kind, which is useful when they crowd the model and confusing when you have forgotten you did it.
Use fewer than you want to
Three well-chosen points of interest beat twelve. The purpose is to direct attention, and a model covered in markers directs nothing.
The same restraint applies to focals. A camera that moves on every single option becomes seasickness, while one that moves for the two or three choices that genuinely change the product feels considered.
Verified against the product in November 2026