Your First Configurator
This walks one product all the way through: a 3D file goes in at one end, and a working configurator comes out on your storefront at the other.
The product here is a 20 metre catamaran with one option, the planks on its deck, and one extra charge. That is enough to learn the shape of the process, and every step works on Base. To follow along, use catamaran-20m.glb from the tutorial's download, which is a sample for learning, or use one simple product of your own and put its words in place of ours.
You will need a 3D model, ideally glTF or GLB, with the objects your options control separated from one another. Composer also loads .stl, .obj, .ply and .splat, but glTF and GLB are the ones that carry materials, animations and the node structure a configurator switches between, so start there if you have the choice - Supported formats compares all six. If you are not sure your file qualifies, What to Expect explains what to look for.
1. Create a project
Open 3D Bits in your Shopify admin. On the home page there is a short checklist, and its first step has a Create a project button. You can also go to Projects and press New project.
Give it a Project title you will recognise later, such as Catamaran, 20 m.
Also create a product for this configurator 1 is ticked by default. If you are experimenting, leave it ticked and the app creates a draft product and links it for you, so you have something to publish to without touching your real catalogue. If you already have the product you want to use, untick it and link it later.
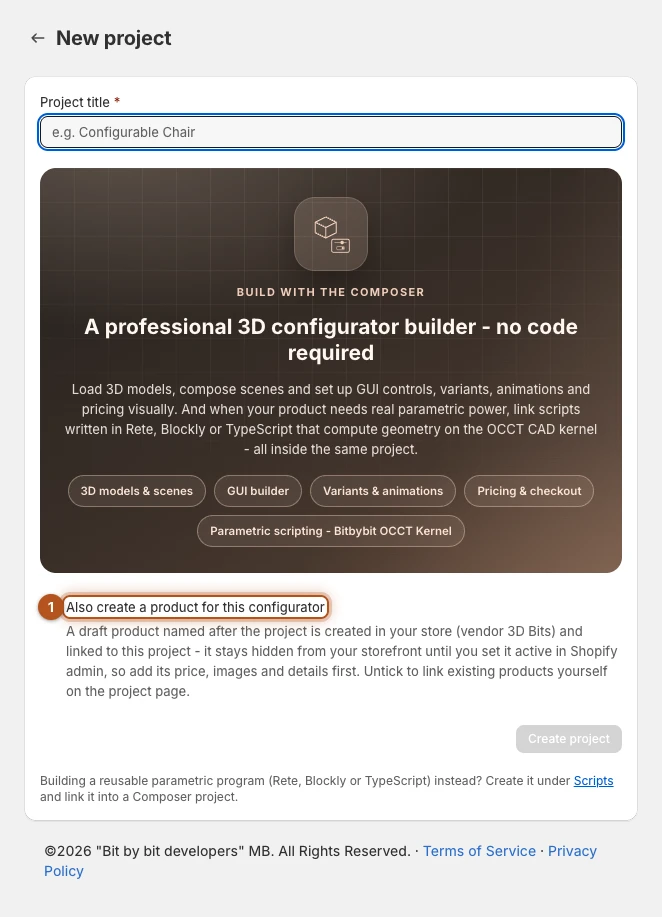
Press Create project, and Composer opens. If the app could not create, link or publish the product, the project's page opens instead and says why: do what it asks, then press Edit to open Composer.
2. Load your model
Composer opens on a screen asking you to upload a 3D file. Drop catamaran-20m.glb on it.
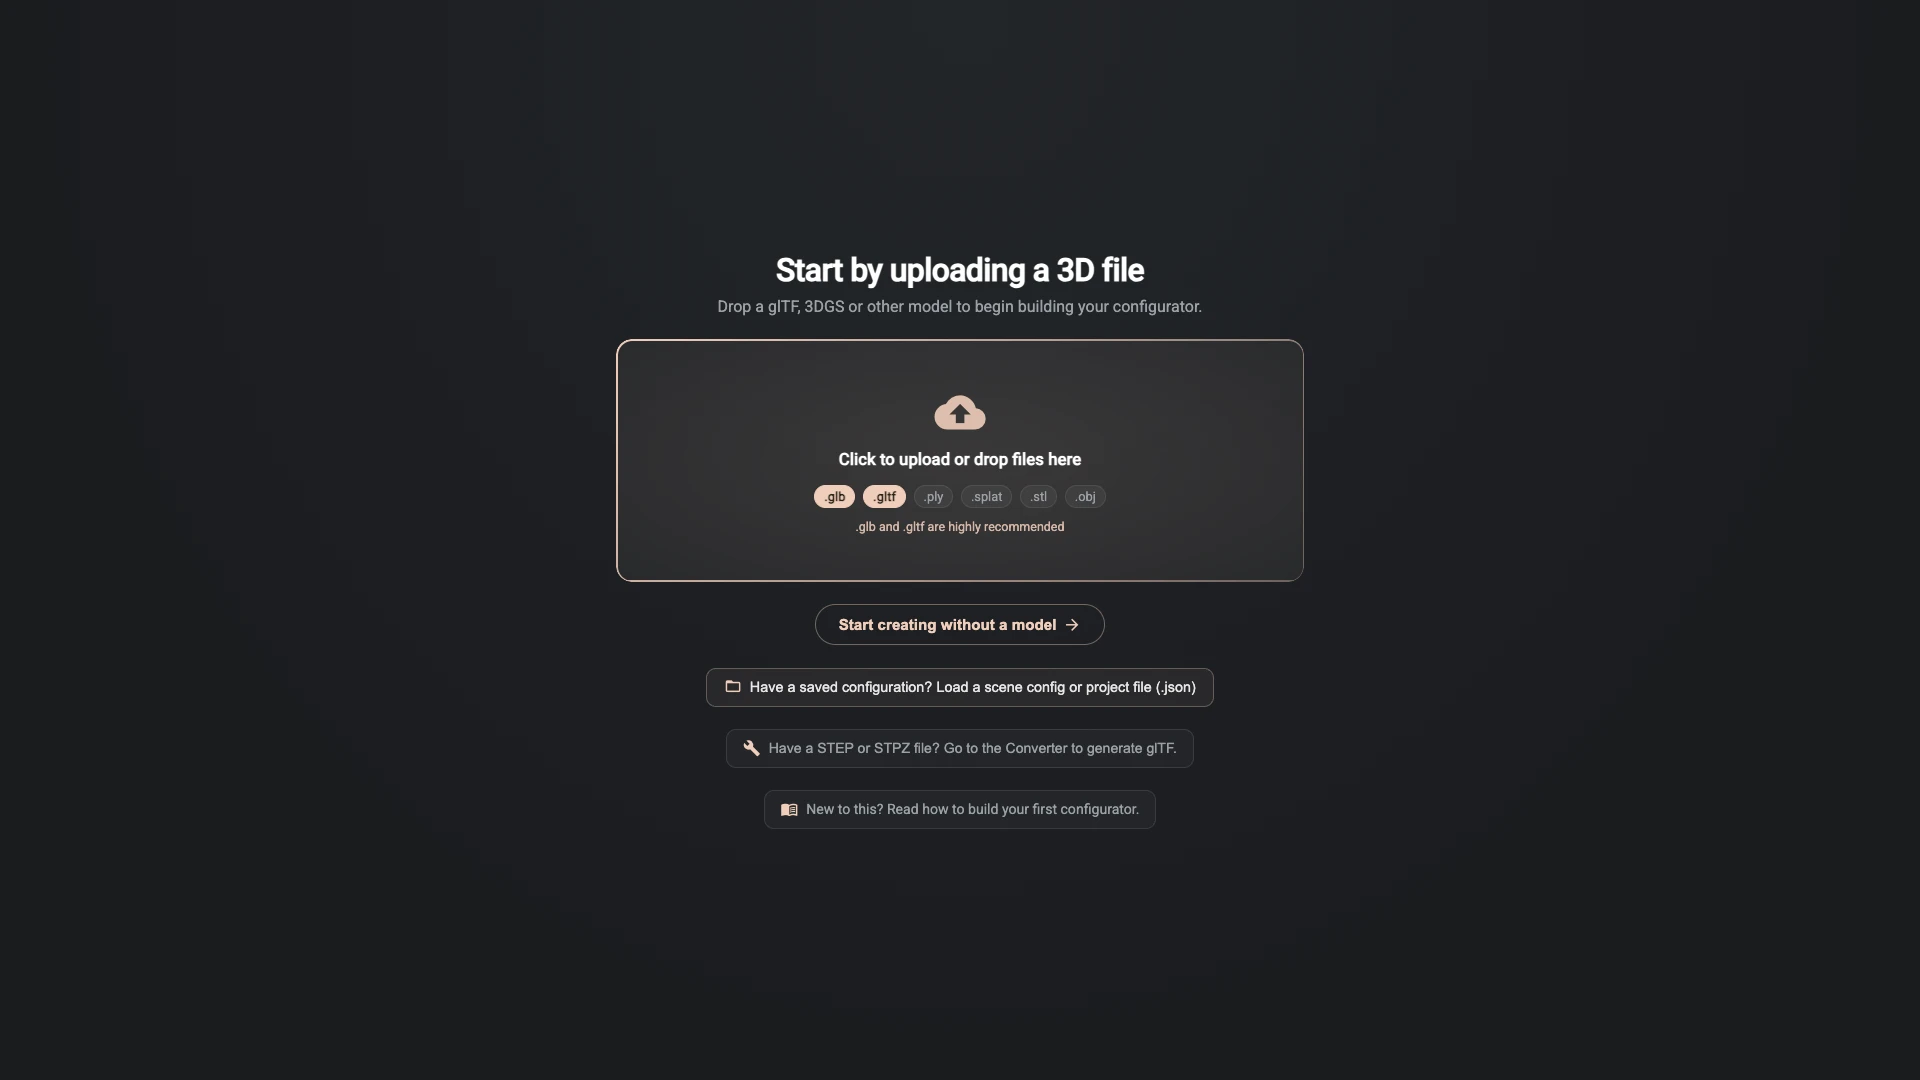
Composer uploads the file, frames it, lights it and opens Models. Orbit around with your mouse and check it loaded the way you expected and is the right way up.
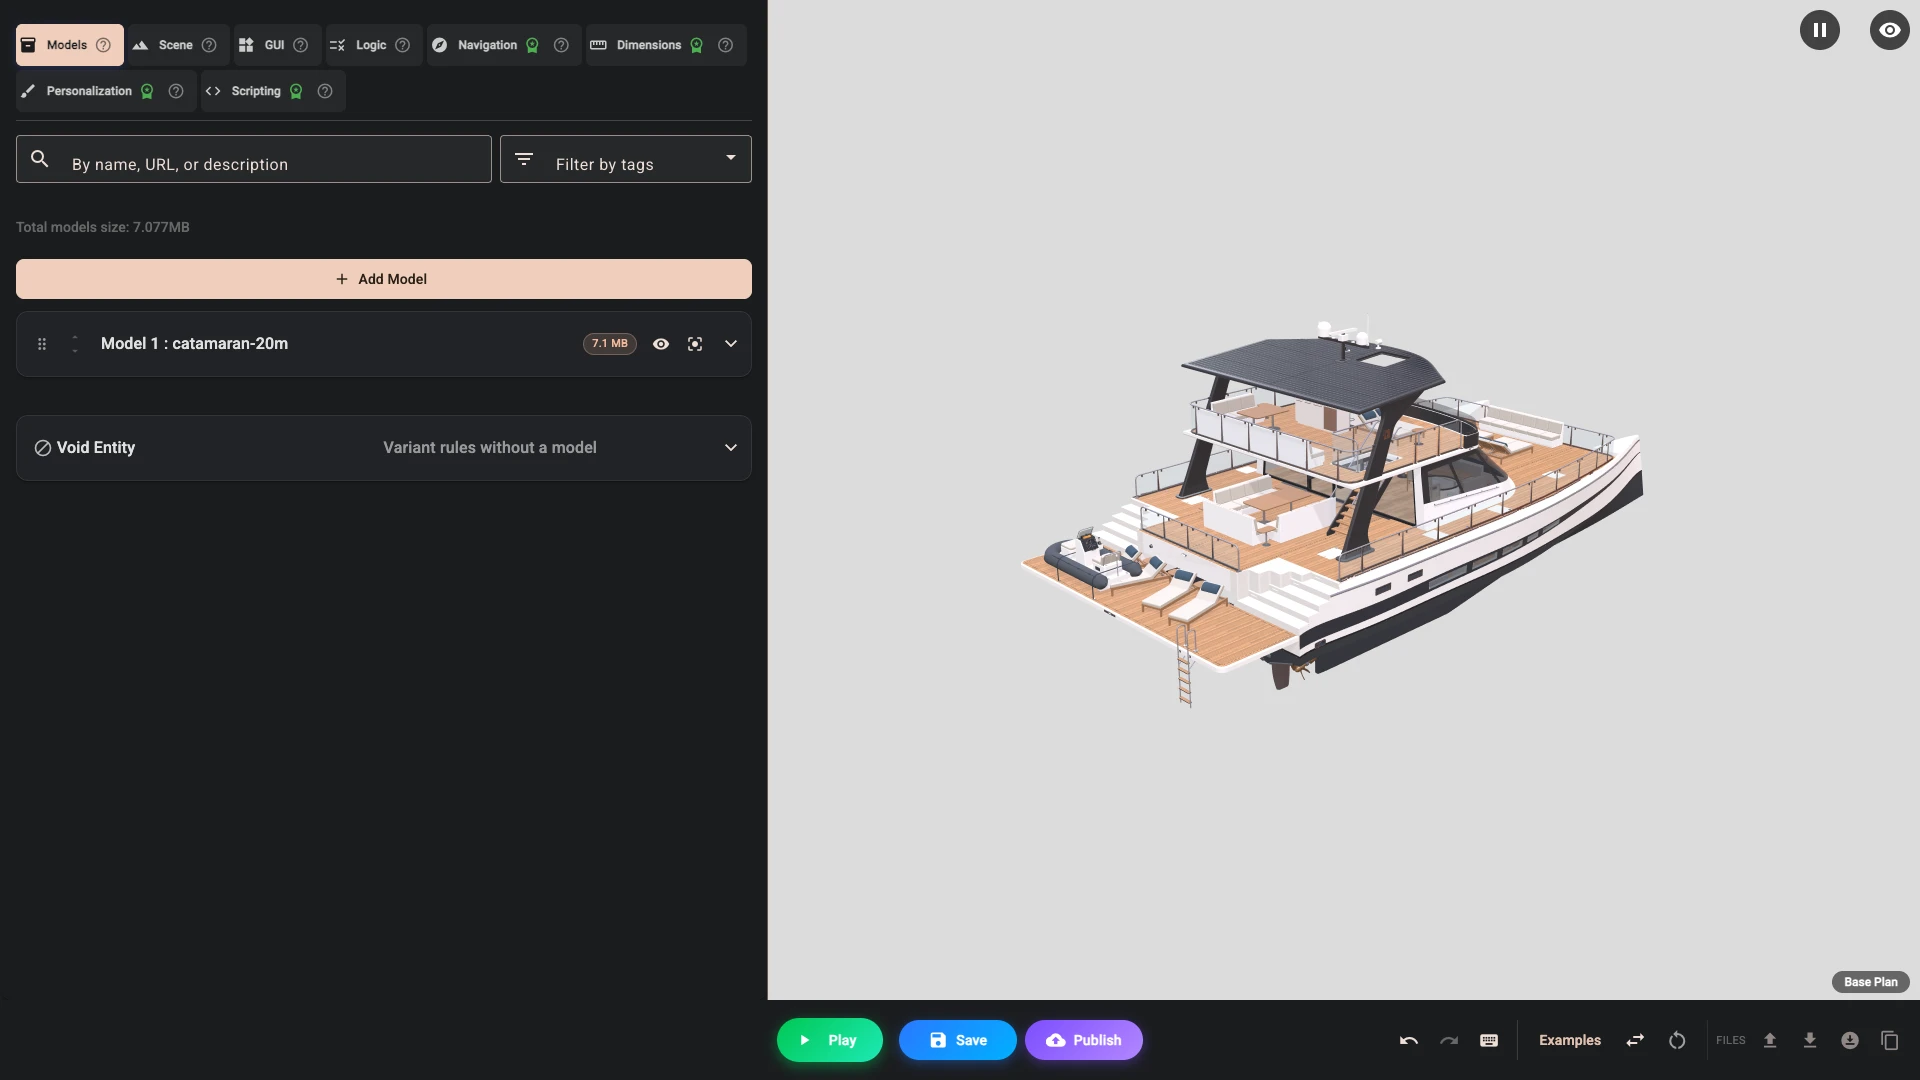
You do not need Fit scene to model after an upload. It is in Scene for later, when you have changed the models and want to start the framing again.
3. Find the parts you will control
Still in Models, open the model's row and press Parse structure 1. This reads the file and lists what is inside it: the parts, the materials, the material variants and any animations.
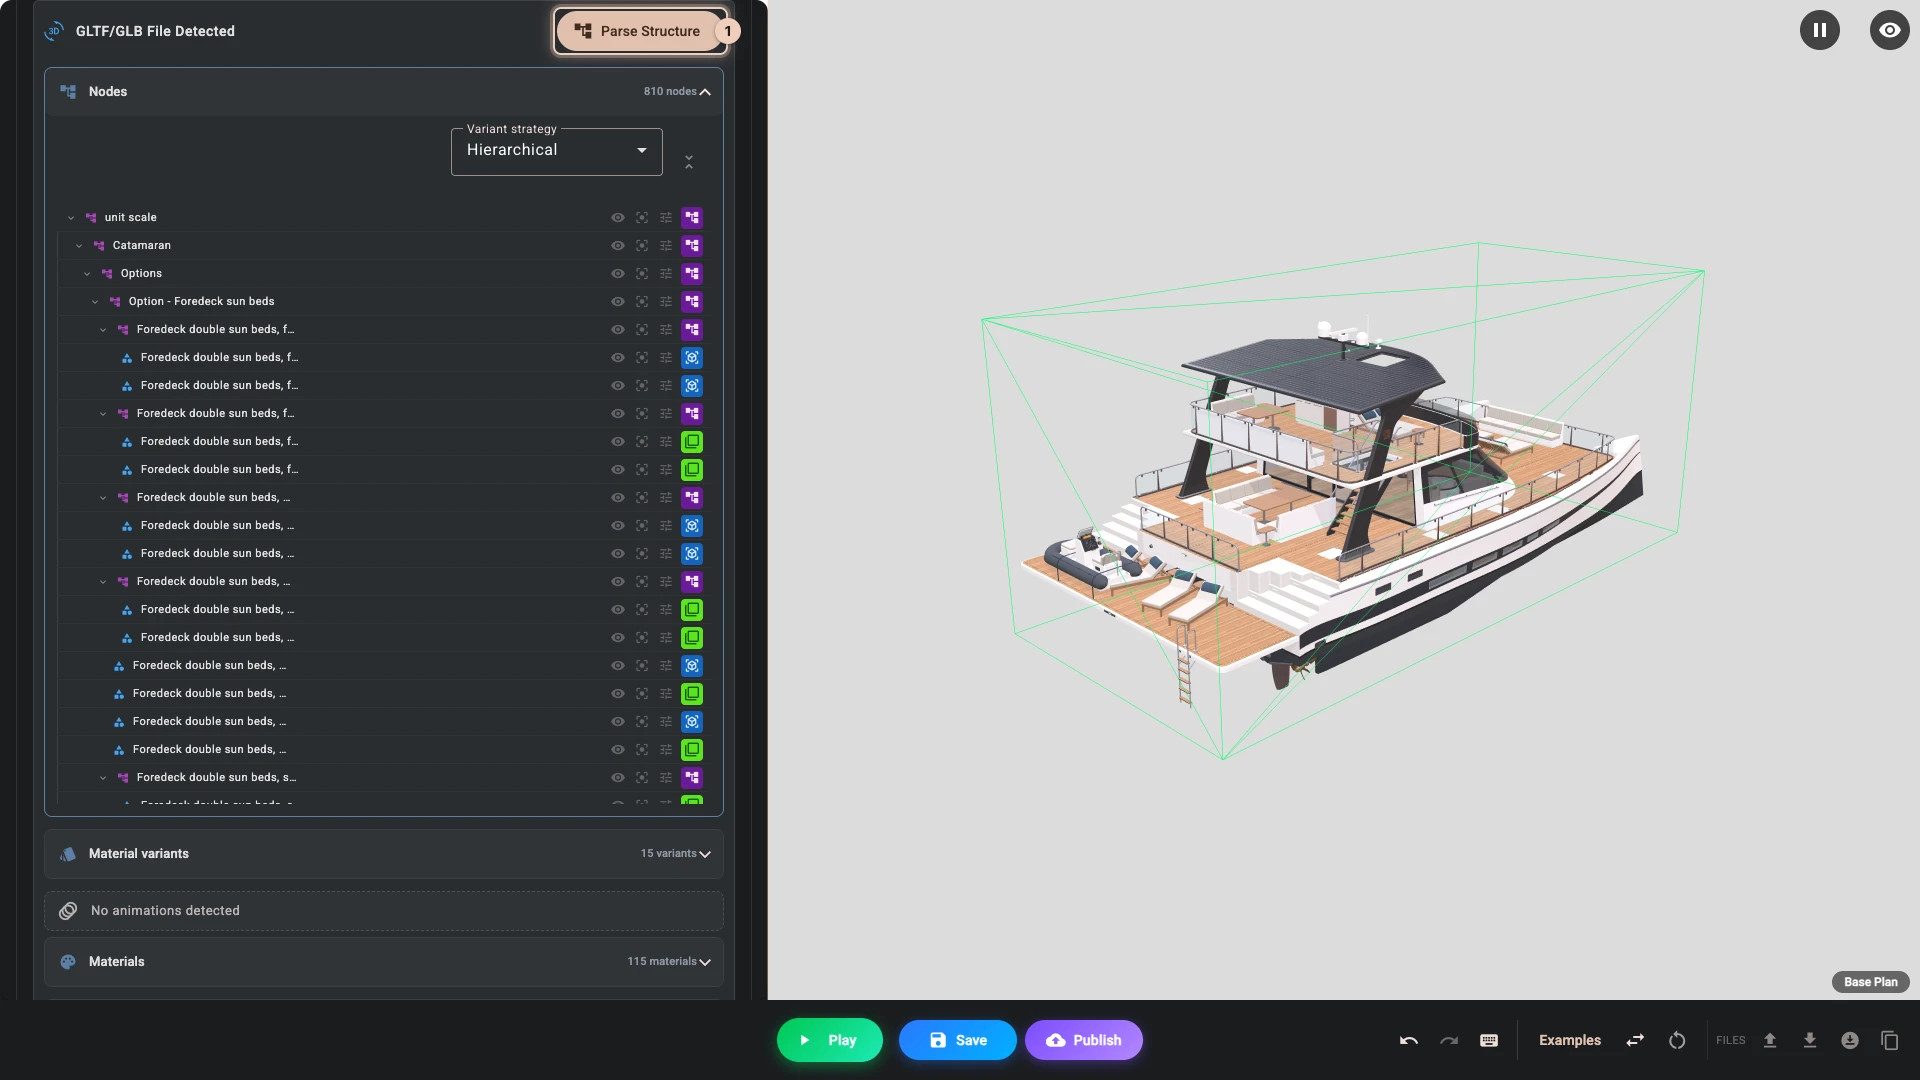
This is the moment of truth for your model. An option can only change what the file keeps apart. The boat's groups, such as Option - Upper helm, sport, are parts a condition can show or hide, and its Material variants hold finishes stored in the file, such as Deck: Silver teak. If your own product turns out to be one object with no variants, the file needs re-exporting with those objects separated, and it is much better to discover that now than after you have built everything else.
4. Build your options
Go to the GUI section. This is the panel your shoppers will use.
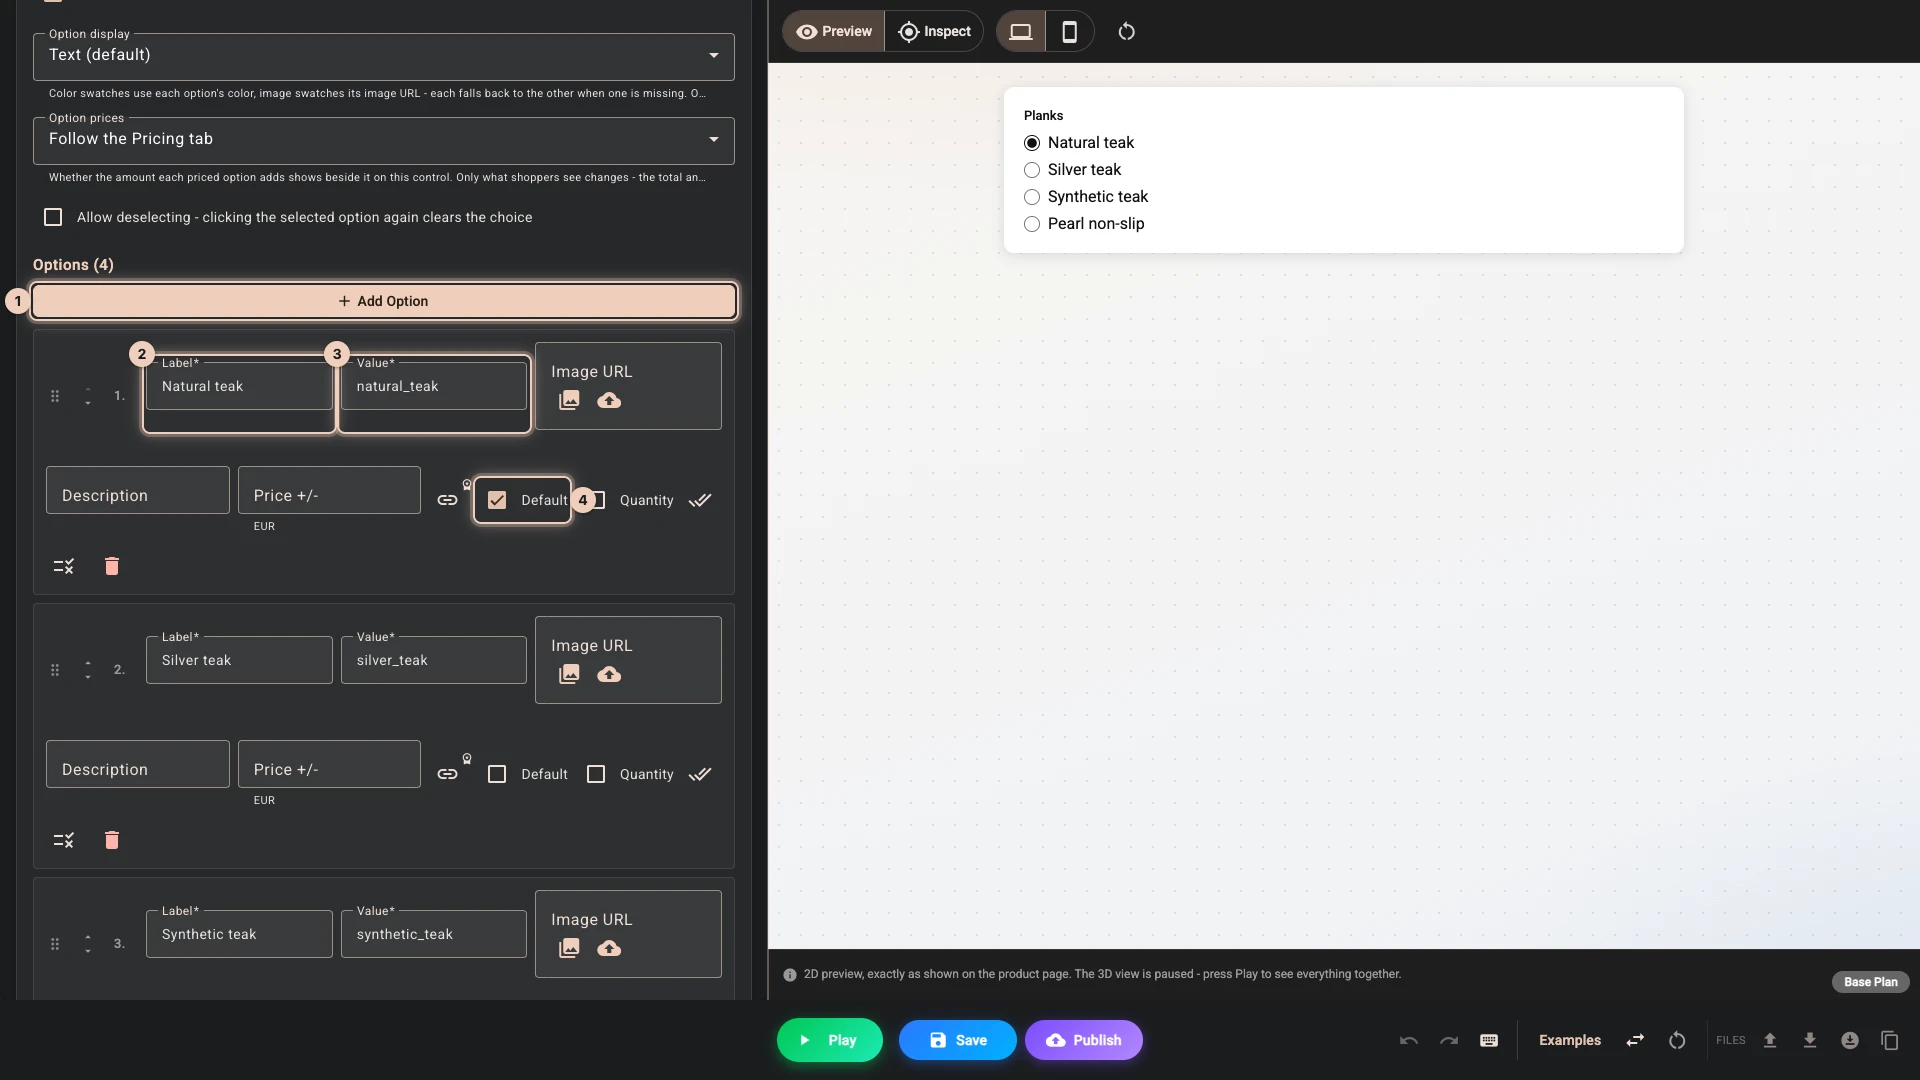
In Controls, press Add control. With the pencil set its Key to deck, then set Label to Planks, since your shopper reads it, and Type to Radio. Press Add option 1 four times and fill in each Label 2 and Value 3: Natural teak natural_teak, Silver teak silver_teak, Synthetic teak synthetic_teak and Pearl non-slip pearl_non_slip. Tick Default 4 on Natural teak.
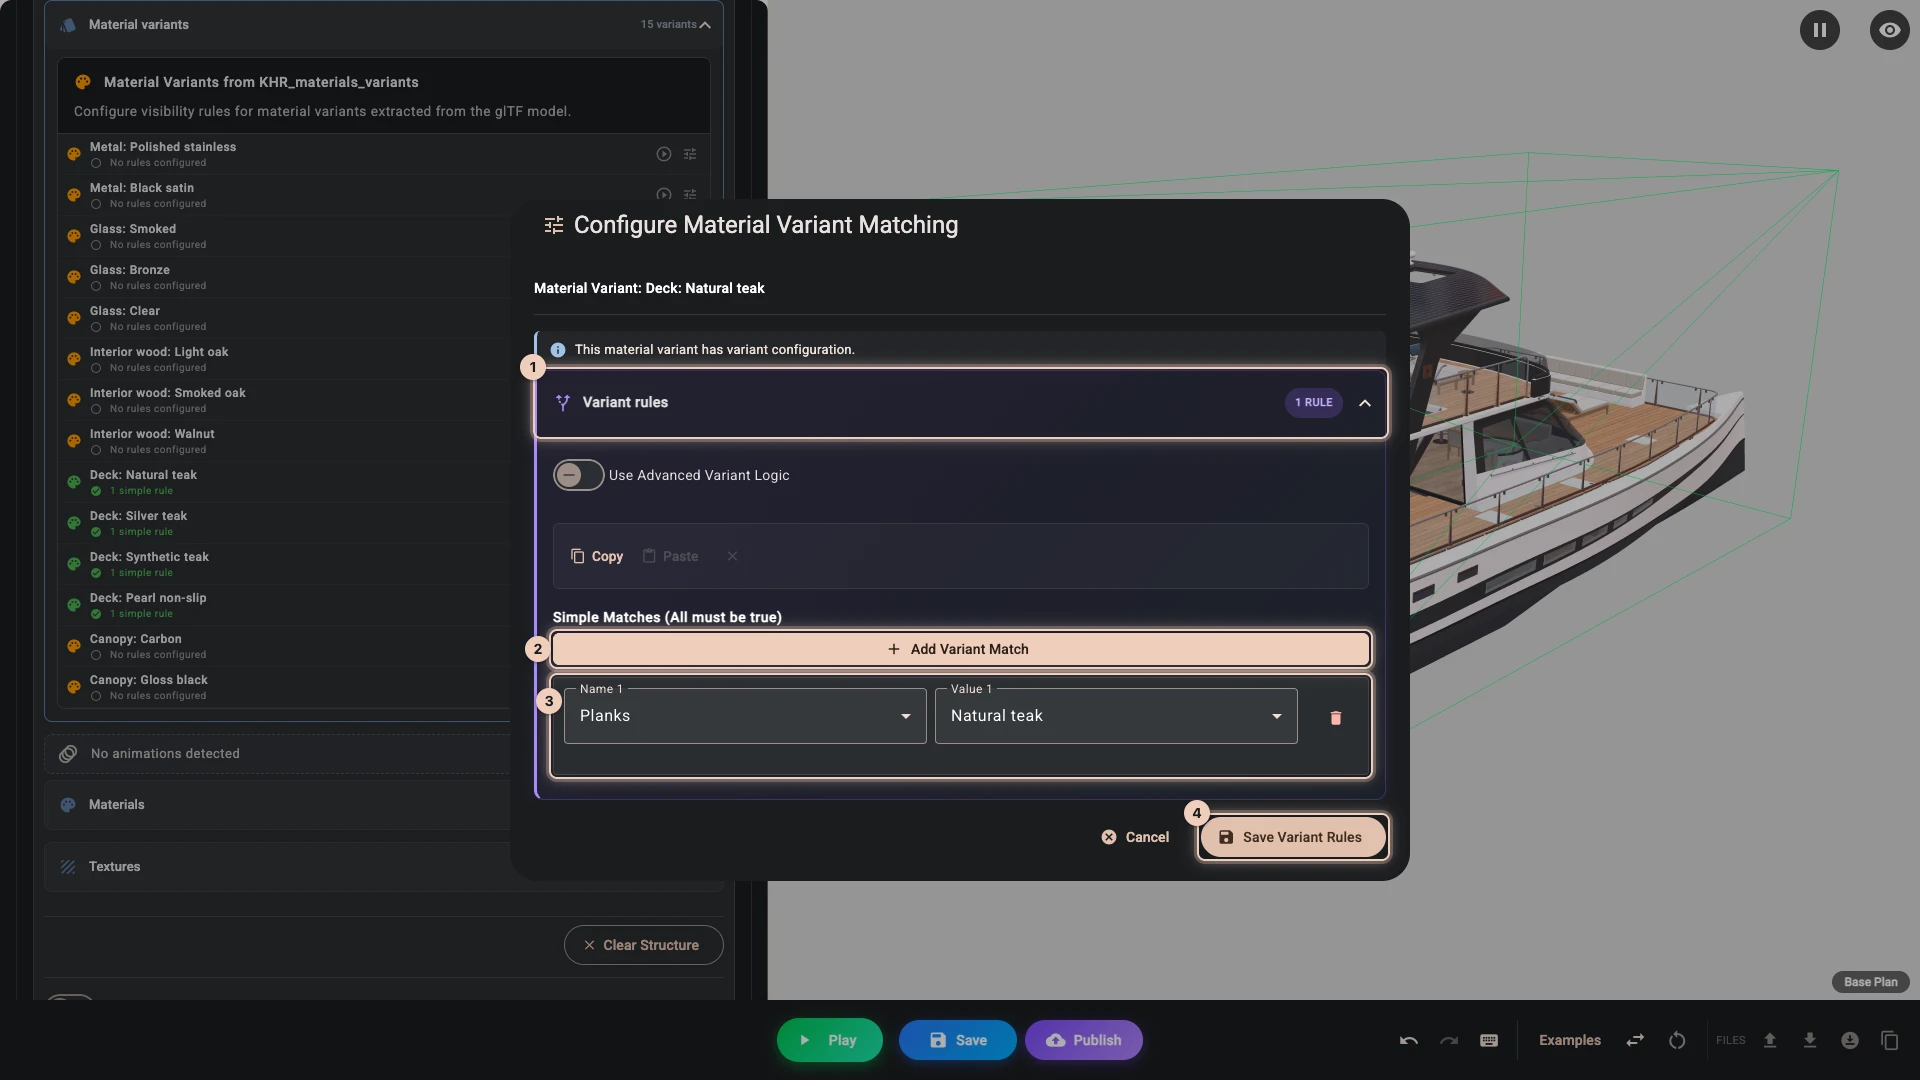
Now connect those options to the model. Open Models, the boat's row and Material variants. Press Deck: Natural teak, open Variant rules 1, press Add variant match 2, set Name to Planks and Value to Natural teak 3, and press Save variant rules 4. Do the same for the other three decks, and you have a configurator.
On your own product an option will often show or hide a part instead of changing a finish. The match is the same, set on the part in the model's Nodes tree: Options and rules does it for the boat's helms.
Layout controls how the panel is arranged, and Style makes it match your theme. Both can wait until the thing works.
5. Try it as a shopper would
Press Play, and scroll over the boat to bring it closer.
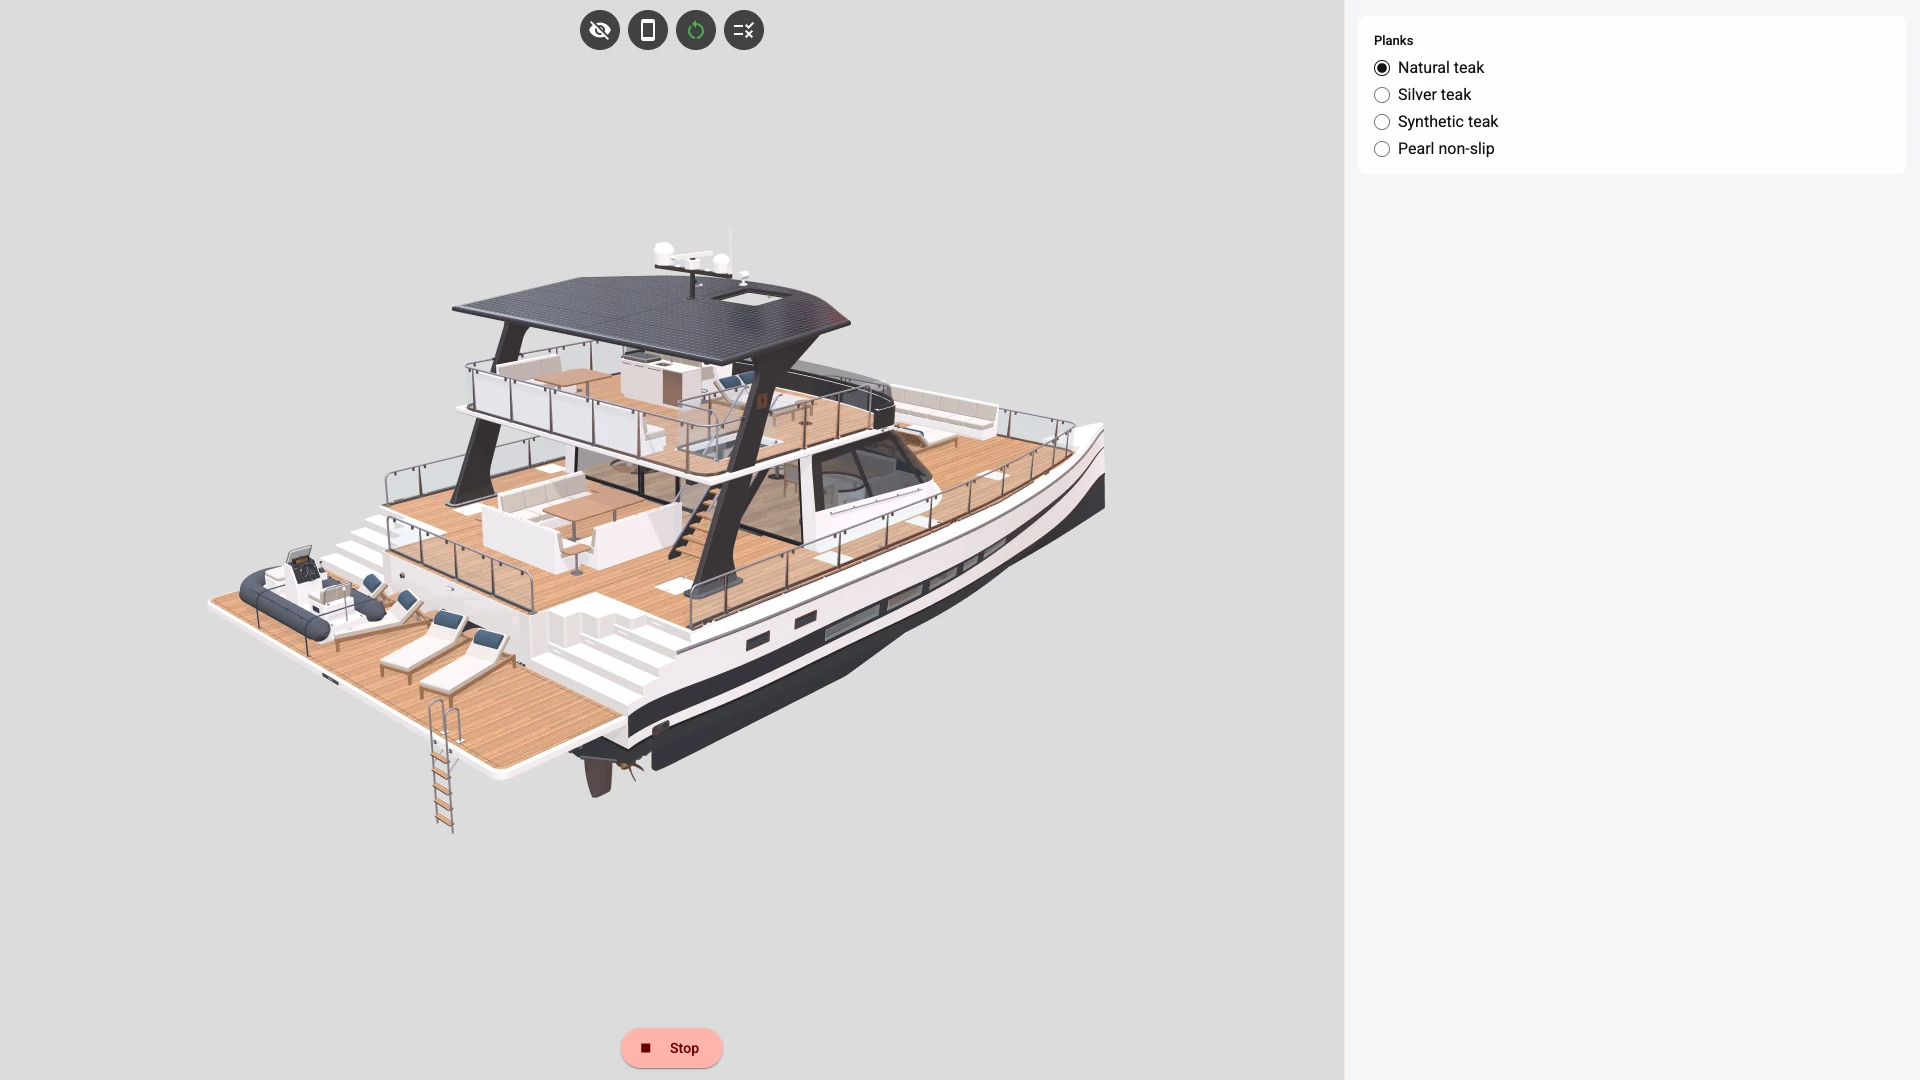
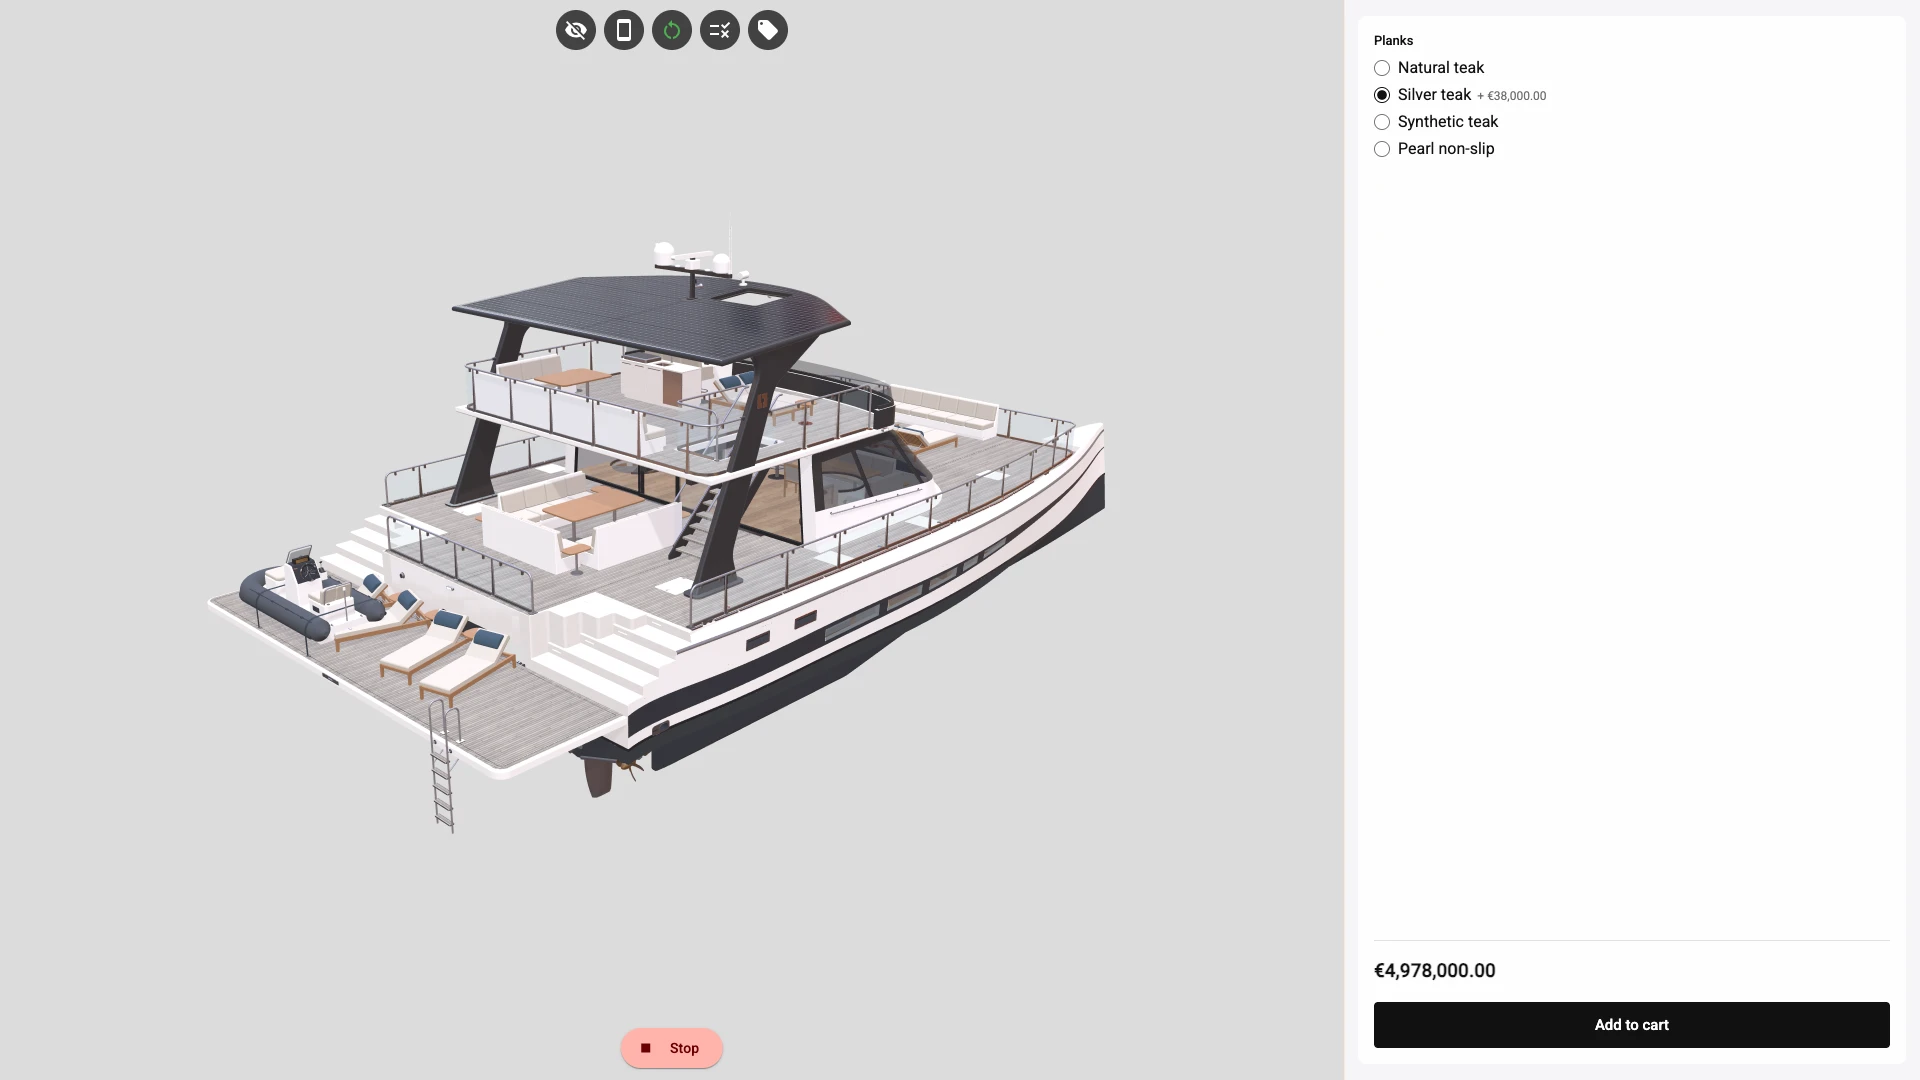
Play runs your configurator as a shopper sees it, within what your plan includes, as the product page does. Pick Silver teak 1 and every plank on the boat changes.
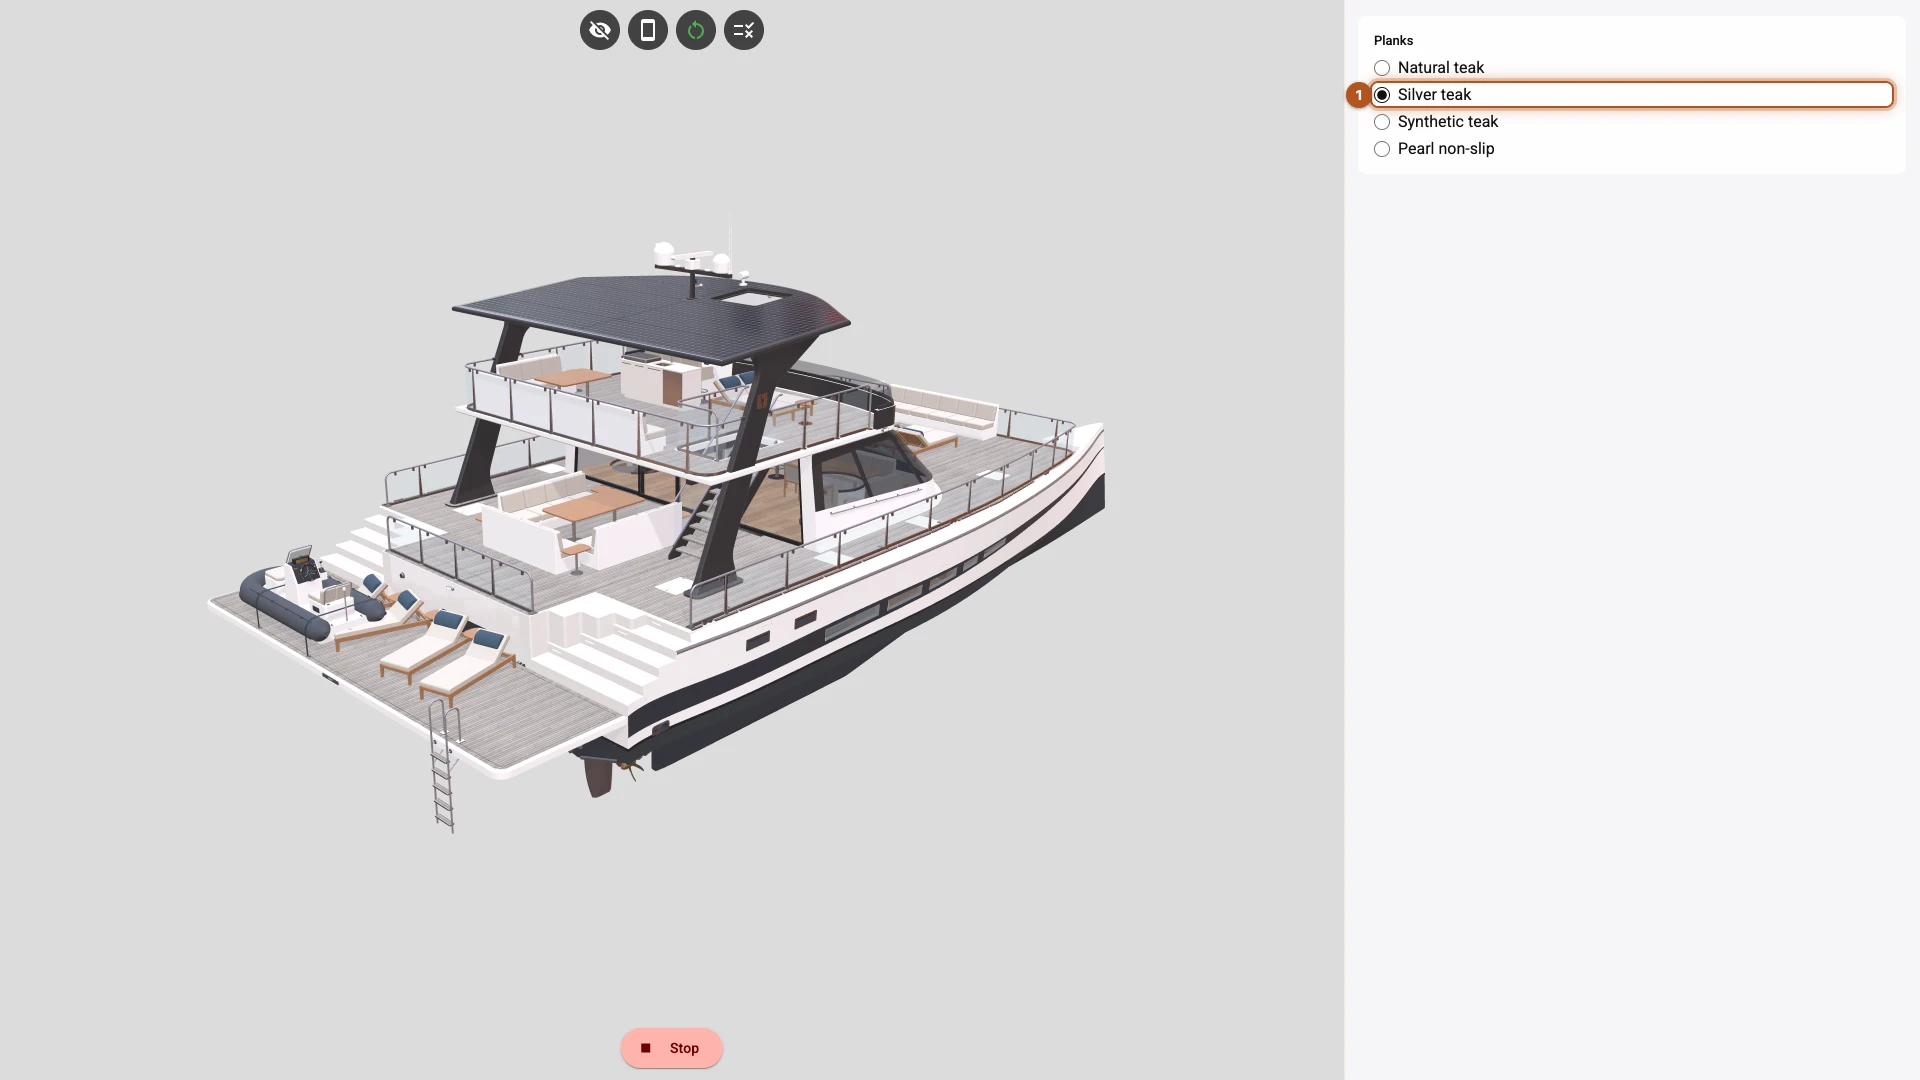
This is the fastest way to catch a part that was left visible when it should not be, or a condition connected to the wrong option. The boat shows both at once here: its sun beds, its tender and all three helms are in the file, and a part with no condition always shows. That is fine for a first run, and Options and rules sorts them out.
Press Stop to go back to editing.
6. Add a price
Go back to GUI, open Pricing, and turn on Enable pricing 1.
Set Base price 2, which is what the product costs before any choices. For this boat that is 4940000, the tutorial's price for 20 m.
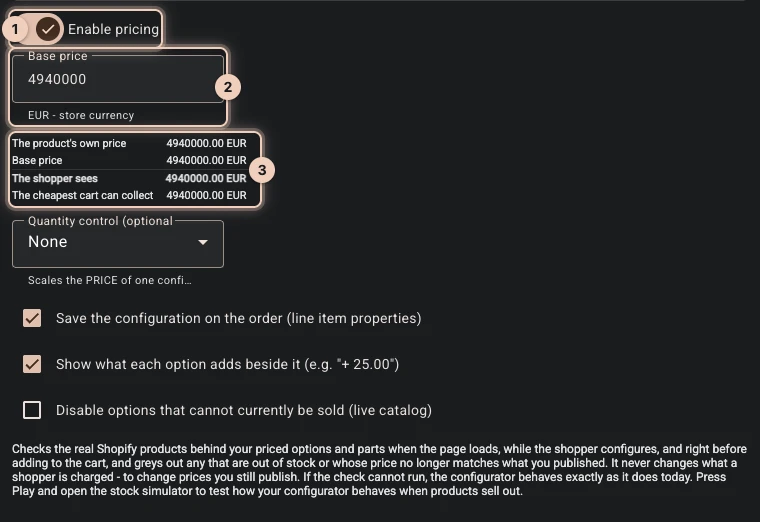
Now look at the small table Composer draws underneath that field 3. It sets the base price beside the product's own price. With Product lines charging, the default, Shopify charges your product at its own price, so the base price is the product's price: make the two the same. If no variant of the product costs the base price, publishing is refused and names the product.
If you ticked the checkbox in step 1, the draft product the app created is priced at 0.00. Open the project's page in the app once you have saved a base price. To get there, close Composer's window, open Projects and press Details on the project's card. Clicking the card itself opens Composer again, and that is how you come back to work on the project later. The Composer item in the app's navigation opens Composer without a project, so it has no Save or Publish. The project's page offers to set the product's price to the base price and will do it for you. If you linked a real product with a real price, set your base price to that price, or let the project page set the product's price to your base price. Either way, check this table again whenever you change the product's price in Shopify.
Then go back to the Planks control in Controls and set Price +/- 1 on Silver teak to 38000. Leave the other three empty, and they come with the boat.
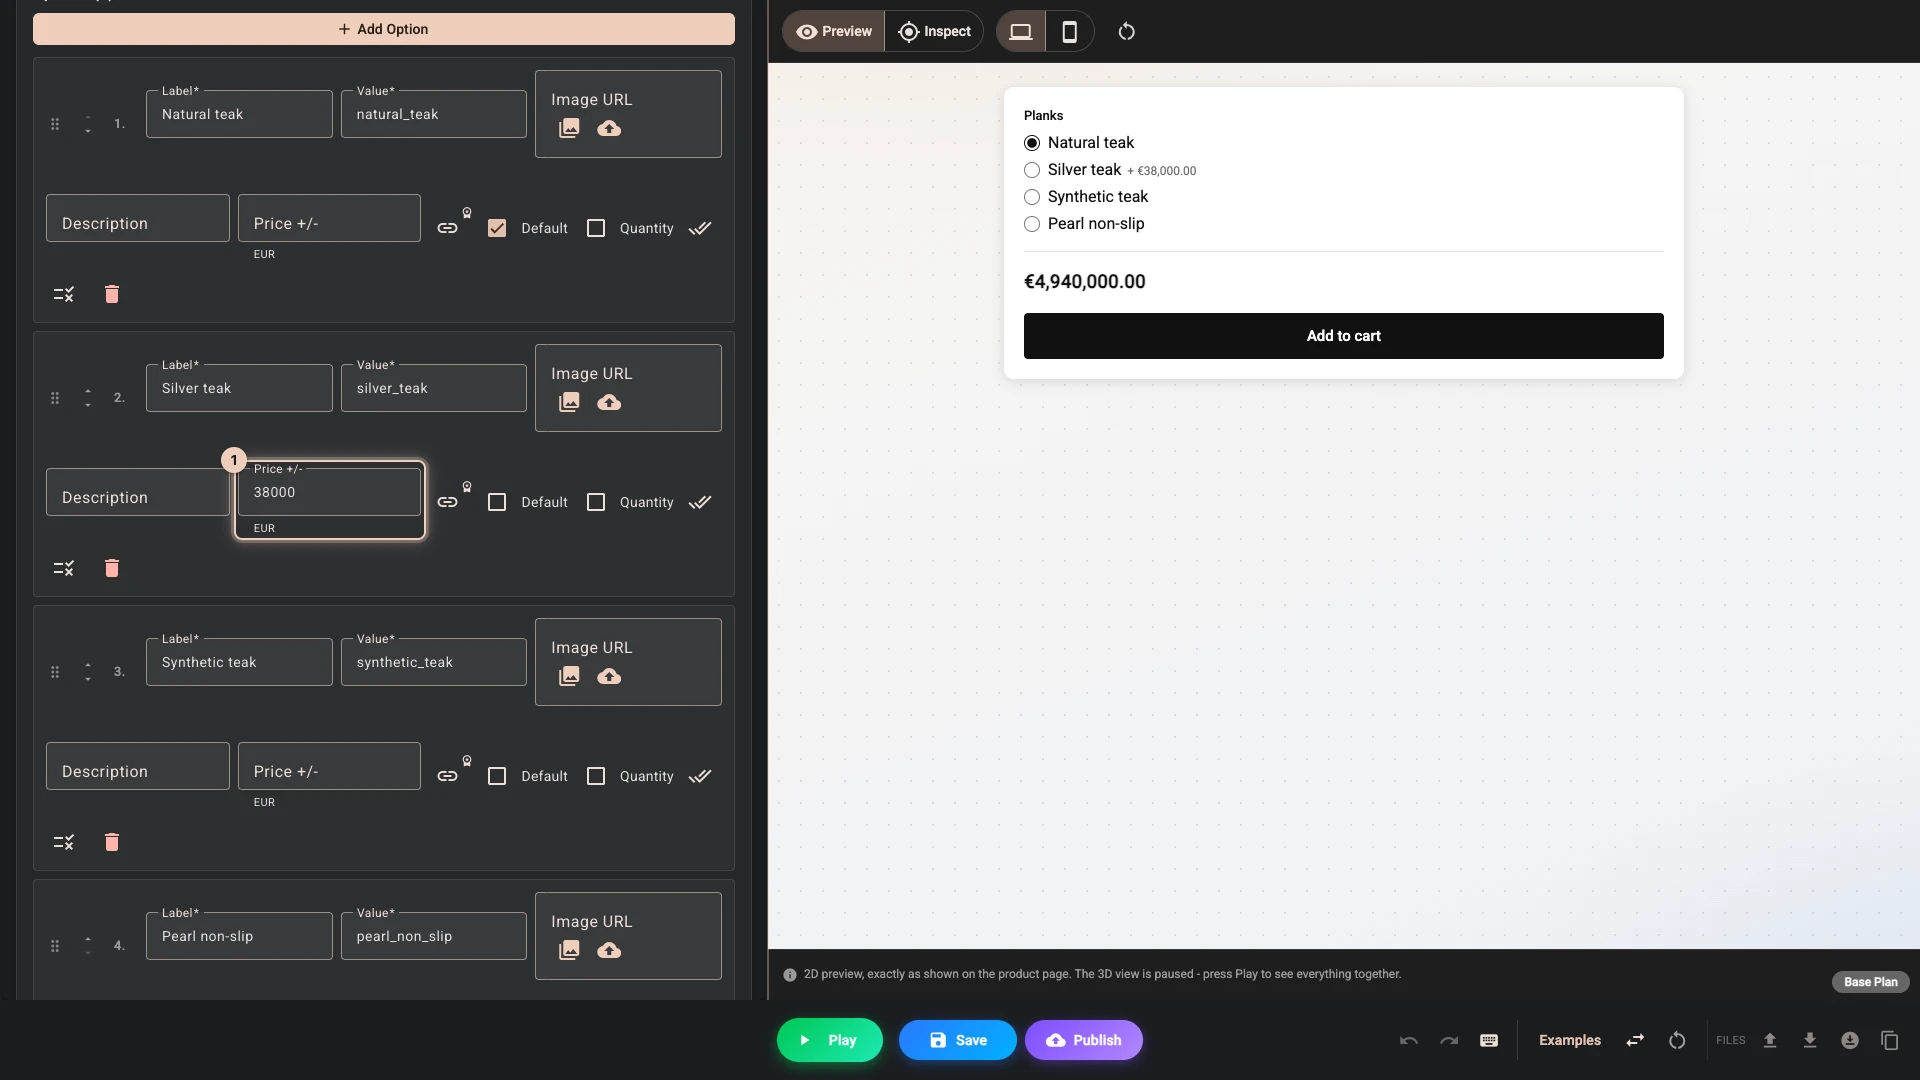
So that your shoppers see the total, open Layout, press Add element, pick Price and set Area to Main panel - pinned to the bottom. Then add an Add to cart element to the same area and press the down arrow on its row, so that it sits under the total. With Product lines charging, only this button puts the boat in the cart together with the charge for Silver teak. Your theme's own Add to cart adds the boat alone, and the cart refuses it.
Press Play again and pick Silver teak. The total goes from 4940000 to 4978000, and that total is what Shopify will charge.
Pricing has real depth to it, including formulas over sliders and options that draw from your own catalogue. Setting up pricing takes it one step at a time, and Pricing covers all of it when you need it.
7. Save and publish
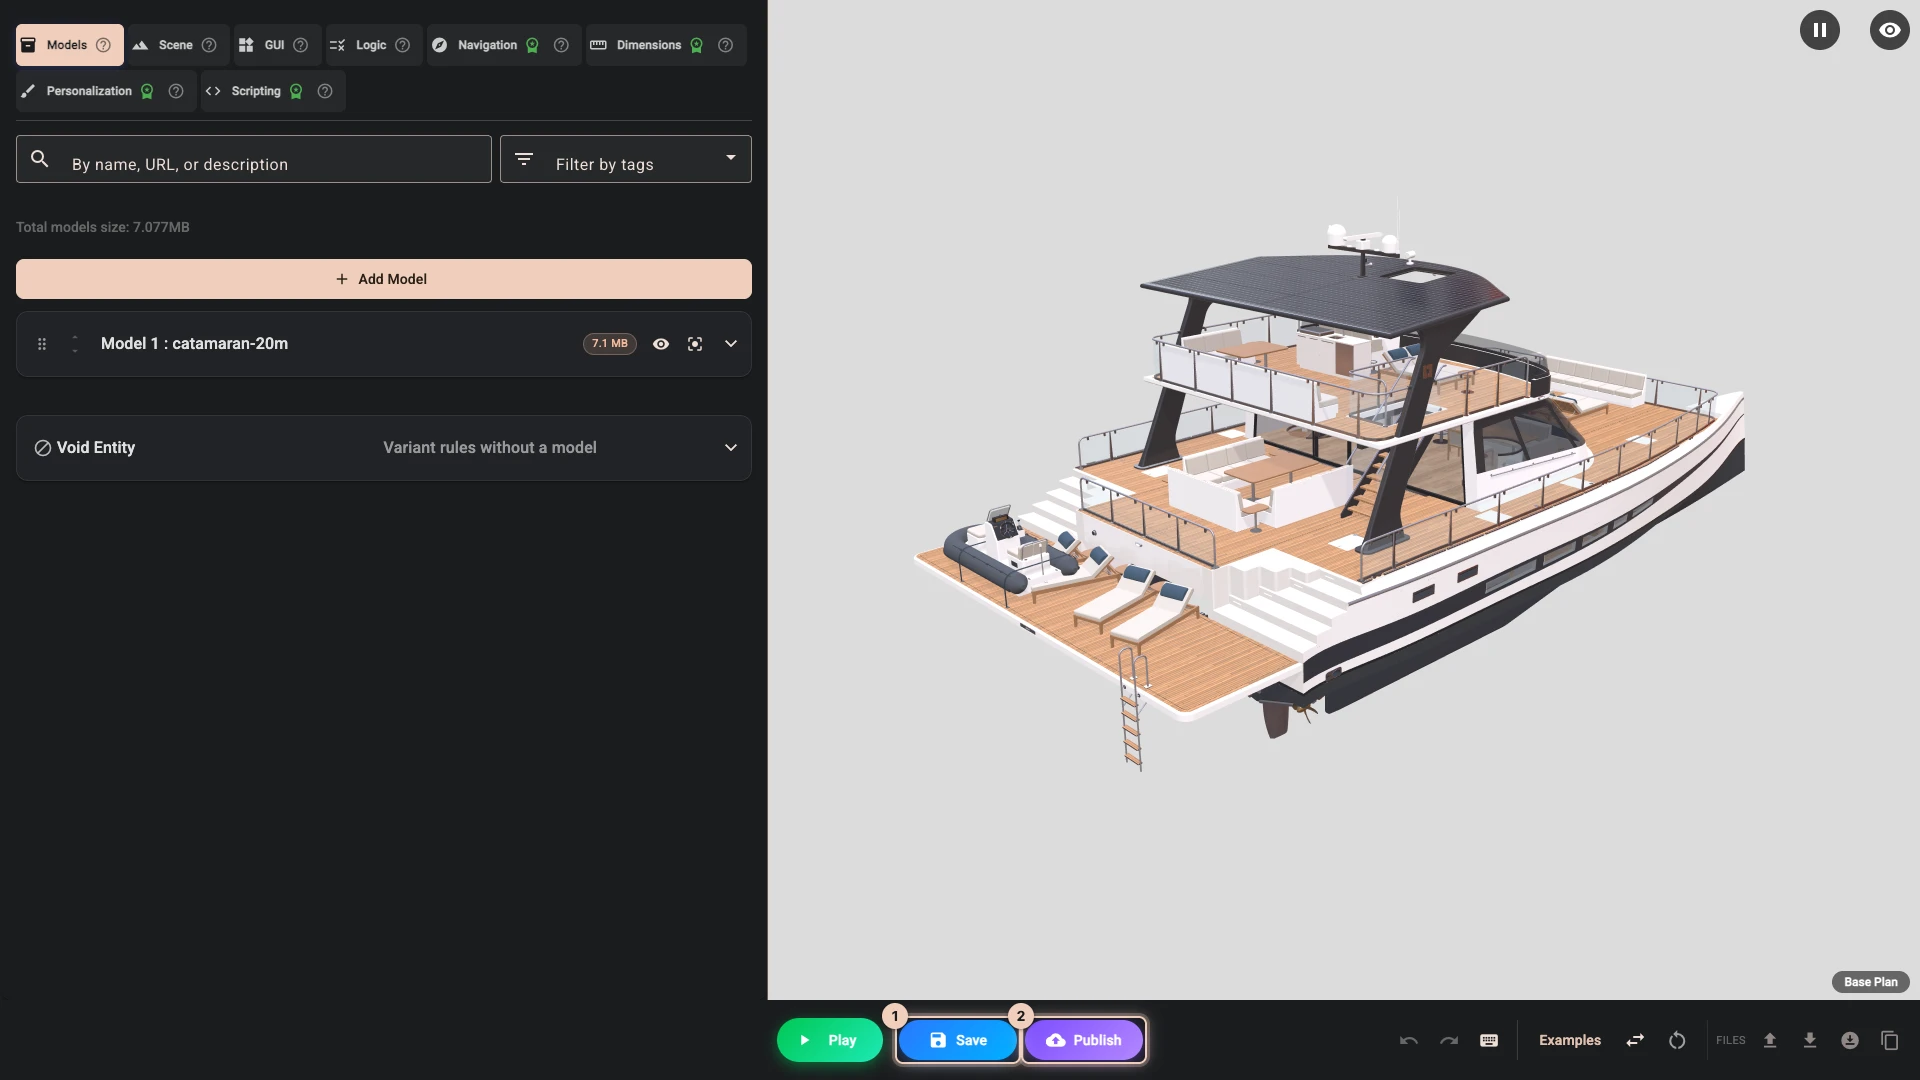
Save 1 stores your work in the project. Press it as often as you like, the same way you would with any document. Composer also saves the draft on its own a moment after each change, and shows a broken-sync icon beside Save when it cannot.
Publish 2 is the separate, deliberate step that sends the configurator to your storefront. These are different on purpose, so you can keep working on a project without your changes going live halfway through.
Before publishing, make sure the project is linked to a product. If you ticked the box in step 1, that is already done. Otherwise press Select products under Linked products on the project's page, or pick one when Publish opens Shopify's product picker. If you close the picker without choosing, the project is still published, but only to its own address, and no product page shows it: link a product and publish again.
Then press Publish on Composer's bottom bar. Composer asks once more, then saves and publishes. You can also publish what you last saved from the project's page in the app.
If something stands in the way, Composer says what. Why publishing was refused has every reason and what to change for each one.
8. Switch 3D on for your store
If this is your first project, there is one more thing, and you only ever do it once.
Go to Storefront in the app's navigation - the page is titled Storefront display - press Enable 3D on your store 1, then Open theme editor. This opens your theme editor with 3D Bits switched on, and you press Save there. Enable the app embed covers it in more detail.
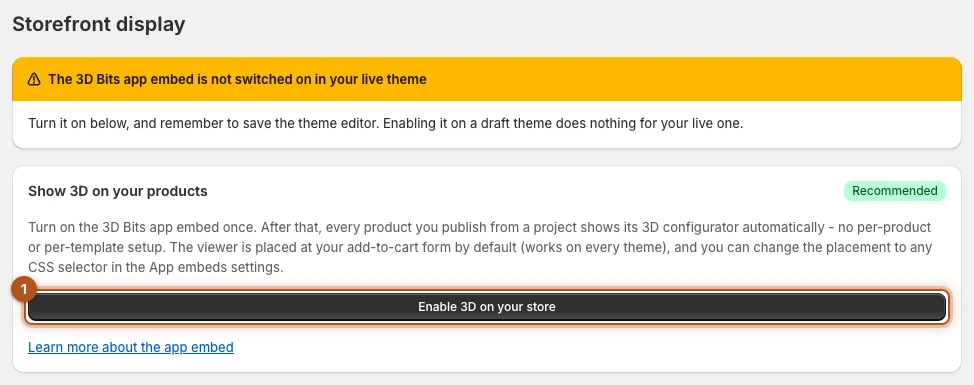
From now on, every project you publish appears on its product page automatically, and this step is behind you.
9. Look at the real thing
A product the app created for you is still a draft, so shoppers cannot see it and a cart will not take it. The button that appears beside Publish, View on storefront or Preview, opens the page for you anyway, so you can try the option and watch the model and the price. When you are ready to sell, give the product its images and details in Shopify and set it to Active.
Before you put it in the cart, set the product to Active in Shopify, or to Unlisted if you want to test it before shoppers can find it. Then use the page as a shopper: change the option, watch the model, watch the price, and put it in the cart. Under the 3D view your theme still shows the product's own title and price, which leaves out Silver teak. Your theme and the configurator shows how to hide them, and how the configurator and your theme's buttons share the page.
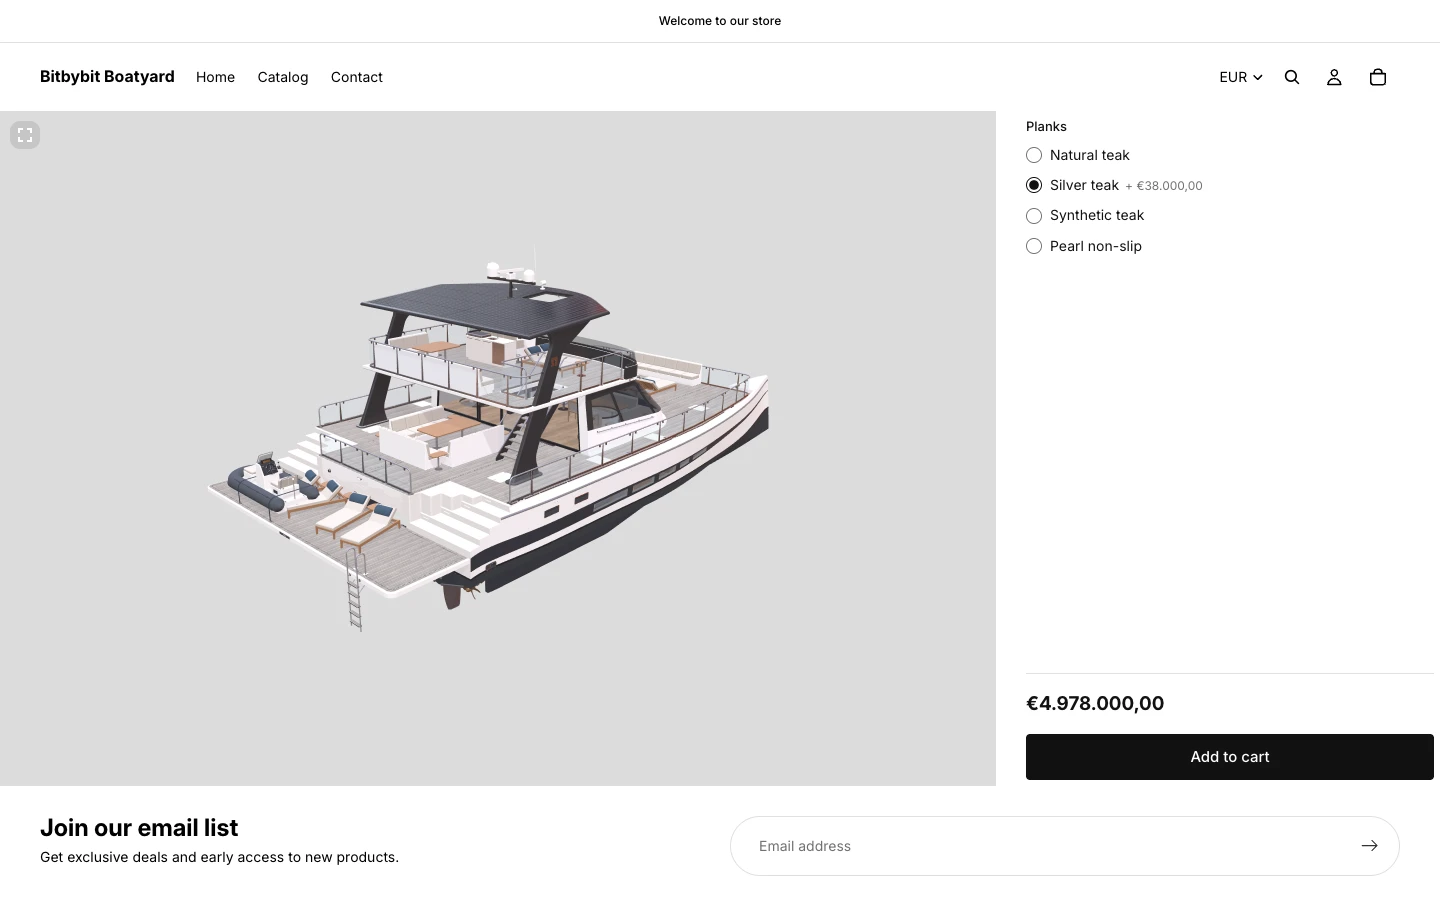
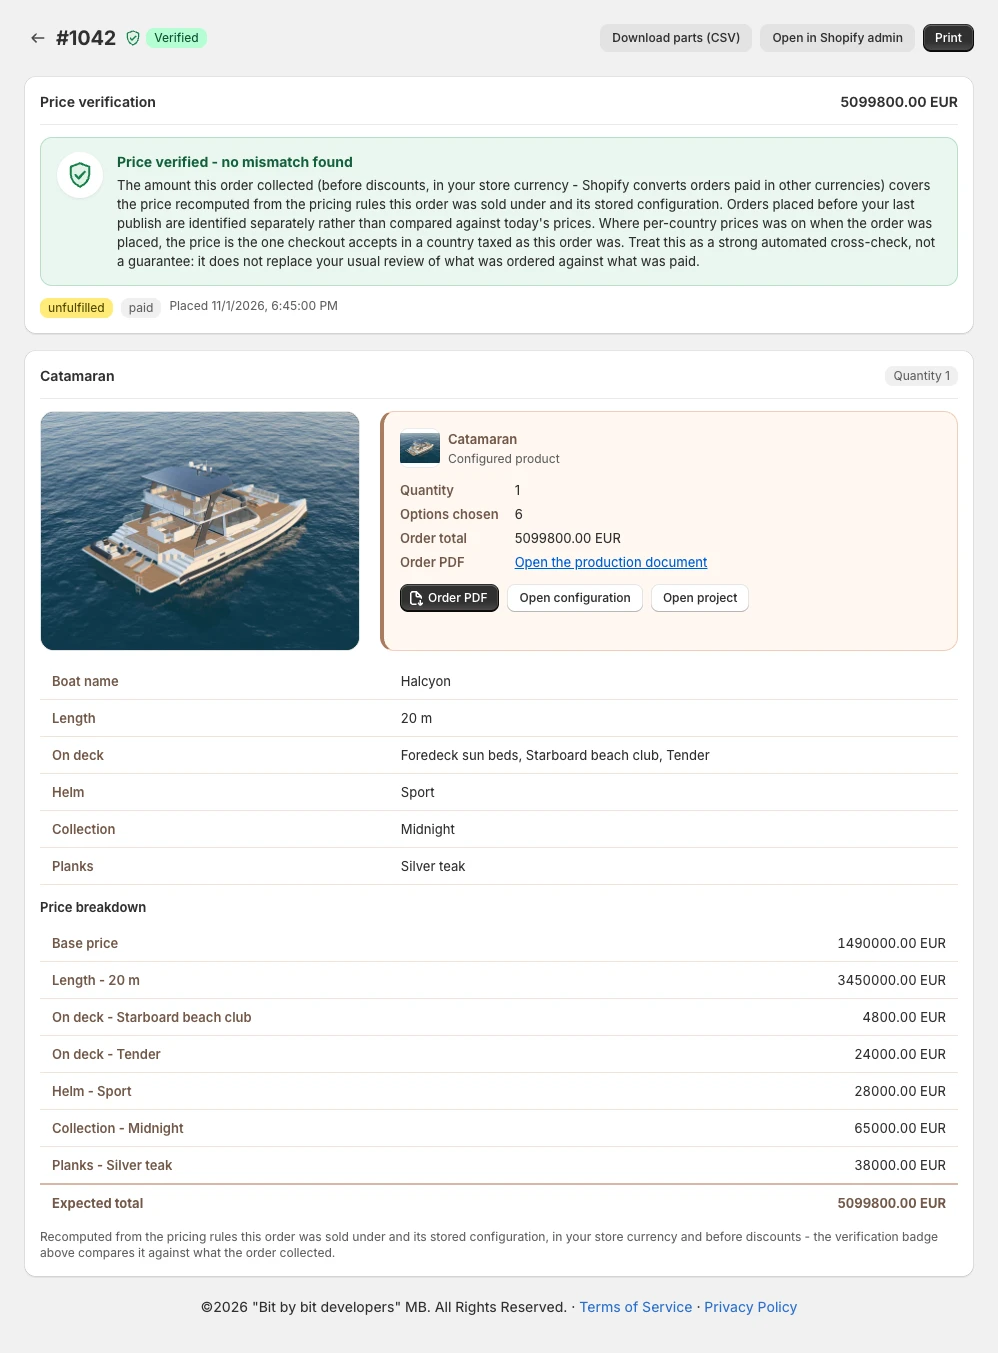
Then place an order, as Going live describes, and check it. The app's Order review page shows exactly what was configured, which is what your workshop will work from, and whether the order paid the right amount.
What to do next
You have the whole shape of it now. Everything else is depth in one of these steps.
Take the same boat further with Build the Catamaran Configurator. In nine chapters it adds the surroundings, the options, three sizes, a designed panel, prices and a name on the hull, and each chapter has a file you can start from. This is the path we would take next.
To make it look right, spend time in Composer on the scene and the panel styling. To price properly, read Pricing. And if your first attempt showed up problems with the model itself, 3D Assets is where to go, or send it to us at info@bitbybit.dev and we will tell you what needs changing.
Verified against the product in November 2026